I first made this on a sticky summer evening with a half-melted stash of chocolate and zero will to turn on the oven. My hopes weren’t high—just wanted to use up bits before they went sad and stale. But then I tasted it. Crunchy biscuits, chewy honeycomb, buttery chocolate holding it all together? Oh. My. Word.
I did mess it up the first time—added marshmallows too soon and they melted into goo. But once I nailed the timing (and figured out how not to burn the chocolate), this became my go-to emergency dessert. No oven. No fuss. And everyone asks for seconds.
Let me walk you through it—and what makes it better than your average fridge cake.
WHAT MAKES THIS RECIPE SPECIAL
Rocky road gets made a lot—but this one hits different.
- Two chocolates: Using milk and dark gives depth without bitterness.
- Honeycomb bars: That crackle! I slice them thick so they don’t disappear.
- Golden syrup + butter: Makes the mix fudgy, not dry or brittle.
- No marshmallow melting: You add extras (like honeycomb) after pressing into the tin. It’s a tiny step, but crucial.
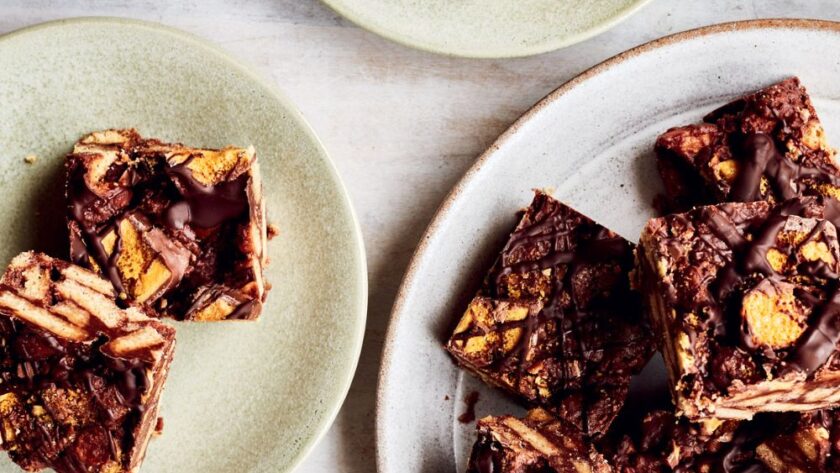
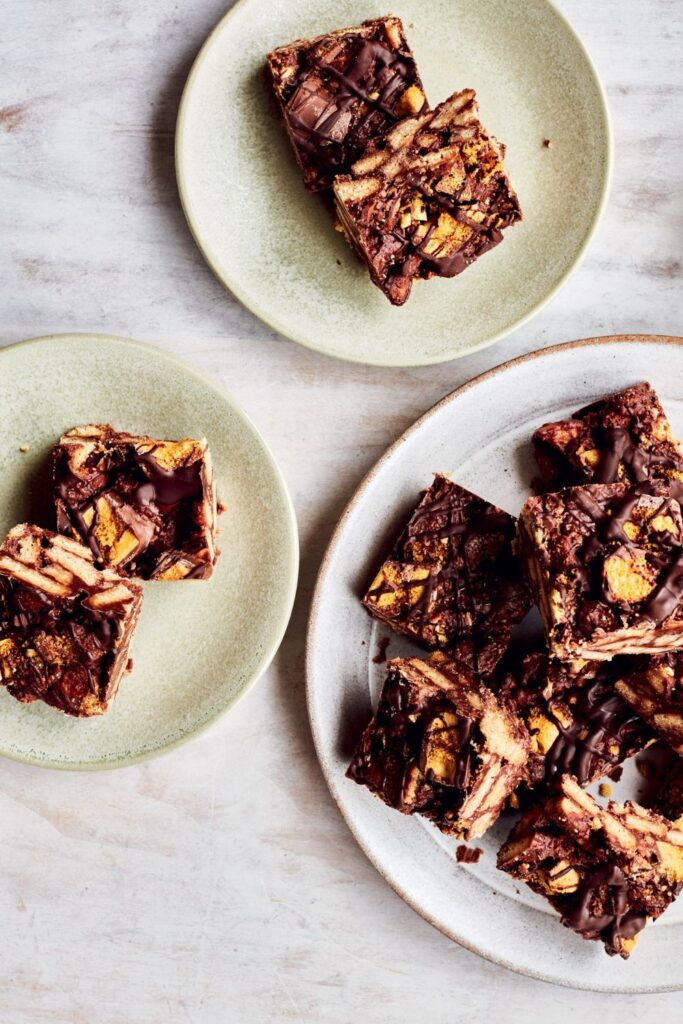
And the texture? Every bite is creamy, crunchy, chewy and sweet. It’s what fridge desserts dream of being.
INGREDIENTS + WHY THEY MATTER
- Milk Chocolate (400g) – Forms the main base. I tried supermarket own-brand and regretted it. Go decent.
- Butter (225g) – Adds richness and holds the syrup together. Don’t reduce it—it’s not worth the savings.
- Golden Syrup (6 tbsp) – Binds and sweetens. I once skipped it and the bars crumbled.
- Dark Chocolate (75g) – For that extra hit of flavour and contrast on top.
- Digestive Biscuits (500g) – Texture. Crush to nut-sized chunks, not crumbs.
- Chocolate Honeycomb Bars (4 × 32g) – Crunchy and airy. Add after pressing, or they melt. I use Crunchie bars.
MAKING IT YOURS (WITHOUT RUINING IT)
- Add-ins: Marshmallows, dried cranberries, chopped nuts—go wild. Just keep the total add-in weight about 500g.
- Gluten-Free? Use GF digestives. Texture holds up perfectly.
- No Golden Syrup? Try light corn syrup or runny honey—but golden syrup gives the best chew.
- Want it darker? Swap half the milk chocolate for more dark—great for grown-ups.
MISTAKES I’VE MADE (AND HOW TO AVOID THEM)
| What Went Wrong | Why It Happens | How to Fix It |
|---|---|---|
| Mixture crumbled | Skipped golden syrup | Stick to the full amount—it binds it all together |
| Honeycomb turned to goo | Added it too early, while warm | Let mix cool slightly, then press it in on top |
| Bars broke while cutting | Didn’t chill long enough | Chill for 2+ hours and use a hot, sharp knife |
HOW TO MAKE MARY BERRY’S HONEYCOMB ROCKY ROAD
1. Prepare Your Tin
Grease and line a 30 × 23cm (12 × 9in) traybake tin with non-stick paper.
2. Melt the Milk Chocolate Mix
In a heatproof bowl over simmering water, gently melt milk chocolate, cubed butter, and golden syrup. Stir until glossy and smooth. Don’t overheat.
3. Melt the Dark Chocolate
In a separate bowl, melt the dark chocolate the same way. Set aside for topping.
4. Mix in the Biscuits
Crush the digestives to rough chunks—not dust—and stir them into the milk chocolate mix. Fold until every bit is coated.
5. Press + Top
Tip the mixture into your prepared tin. Press down firmly. Scatter the chopped honeycomb bars on top and gently press in. Drizzle with dark chocolate in a zigzag.
6. Chill and Slice
Refrigerate for at least 2 hours. Cut into 24 squares with a sharp knife. (Pro tip: dip the knife in hot water for cleaner slices.)
TIPS FROM MY KITCHEN
- I crush the biscuits in a zip bag with a rolling pin—less mess, more control.
- Don’t rush the chill. If it’s even slightly soft, it’ll fall apart when slicing.
- If using marshmallows, fold them in once the chocolate mix has cooled a bit—no melting disasters.
STORAGE + SERVING
- Fridge: Keeps up to 3 days in an airtight container.
- Freezer: Freezes beautifully. Layer with baking paper, freeze up to 1 month.
- Thaw: In the fridge for 2–3 hours. Still holds its snap.
- Serve with: Strong coffee, or secretly straight from the fridge at midnight. (No judgement.)
FREQUENTLY ASKED QUESTIONS
Q: Can I use all dark chocolate instead?
A: You can, but it’ll be more bitter. If you like rich, dark flavours—go for it. Otherwise, stick to the milk/dark mix.
Q: What kind of honeycomb bars work best?
A: I use Crunchie bars. Anything light and crisp with a chocolate coating will do.
Q: Can I make this nut-free?
A: Absolutely. This version has no nuts—just check your honeycomb bars for cross-contamination.
Q: How long do these keep?
A: About 3 days in the fridge, or 1 month frozen. They rarely last that long, though.
Try More Recipes:
Mary Berry Honeycomb Rocky Road
Course: DessertsCuisine: BritishDifficulty: Easy24
servings10
minutes5
minutes296
kcalA ridiculously easy, no-bake dessert loaded with milk chocolate, buttery biscuits, and crunchy honeycomb. Mary Berry’s Rocky Road is fudgy, crisp, and utterly moreish—the kind of traybake that disappears faster than you can say “just one more.” No oven required, just a little chill time and a sharp knife.
Ingredients
400g milk chocolate, broken into pieces
225g butter, cubed, plus extra for greasing
6 tbsp golden syrup
75g dark chocolate, broken into pieces
500g digestive biscuits, roughly crushed
4 × 32g chocolate honeycomb bars, chopped
Directions
- Grease and line a 30 × 23cm traybake tin with baking paper.
- Gently melt milk chocolate, butter, and golden syrup in a bowl over simmering water. Stir until smooth.
- In a separate bowl, melt the dark chocolate. Set aside.
- Stir crushed biscuits into the milk chocolate mix until coated. Press into the tin.
- Top with chopped honeycomb bars and drizzle with dark chocolate.
- Chill in the fridge for 2 hours. Slice into 24 squares and serve.
Notes
- Crush biscuits to nut-sized chunks, not crumbs—gives better bite.
- Use good chocolate. Cheap stuff goes grainy when melted.
- Let it fully chill before cutting—trust me on this.