Fork biscuits never wowed me as a kid. They were always there, usually next to the Bourbons, quietly plain and slightly forgettable. But after making them myself (mostly because I was low on ingredients), I completely changed my mind.
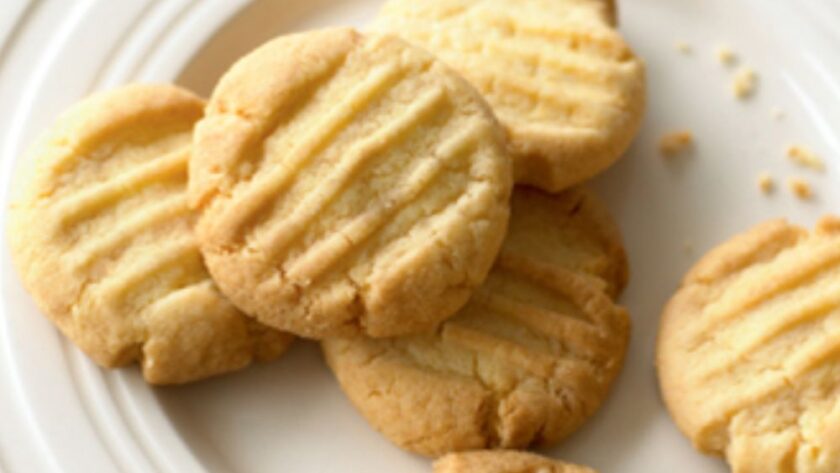
The first batch? Total misfire. I overmixed the dough like I was creaming butter for a Victoria sponge—turns out, that’s a fast track to rock-hard biscuits. They still looked lovely: perfect fork ridges and pale golden edges. But texture-wise? Grim. So I adjusted. Hand-mixed, didn’t chill, kept it simple—and oh, they were perfect. Crumbly, buttery, not too sweet. The kind of biscuit you reach for without thinking—then accidentally eat five.
What Makes This Recipe Special
These work because they strip things right back. No egg, no fuss, just a buttery dough that bakes into something light and snappy on the edges, soft and short inside. The self-raising flour gives them a slight lift—but not too much, so they still feel classic. And the fork press? It’s not just for looks. It helps them bake evenly and adds that nostalgic tea-tin charm.
INGREDIENTS + WHY THEY MATTER
- Butter (100g) – The heart of it all. I tested with baking spread once and the biscuits were limp and greasy. Stick to real, unsalted butter.
- Caster Sugar (50g) – Not too much. You want them gently sweet, not sugary. I tried granulated once—too gritty.
- Self-Raising Flour (150g) – Gives just enough lift. Plain flour made them a bit too dense and didn’t crack as nicely.
Ingredient Swaps That Hold Up
- Lemon or Orange Zest – Adds brightness without changing the structure. I love lemon zest in summer.
- Chocolate Fork Biscuits – Replace 15g flour with cocoa powder. Rich and still light. Works beautifully with a pinch of salt.
- Vegan Version? I used Flora Plant Butter once—it gave a solid result. Slightly more melt-y but still tasty.
- No SR Flour? Plain + ½ tsp baking powder works well. I’ve done it in a pinch.
MISTAKES I’VE MADE (AND HOW TO AVOID THEM)
| What Went Wrong | Why It Happens | How to Fix It |
|---|---|---|
| Too tough | Overmixed the dough | Stop once the flour is just combined |
| Flat, greasy biscuits | Used baking spread | Stick with real butter for structure + flavour |
| Cracked too much | Dough too dry or overbaked | Weigh ingredients and watch the oven time |
| Fork stuck to dough | Didn’t wet it first | Always dip the fork in water before pressing |
HOW TO MAKE MARY BERRY’S FORK BISCUITS
- Preheat the Oven – 180°C / fan 160°C / gas 4. Lightly grease two baking trays.
- Beat the Butter – Use a wooden spoon or hand mixer. Stop once it’s smooth—not whipped.
- Add Sugar, Then Flour – Mix in the sugar first, then flour. Use your hands to bring it together into a soft dough—don’t knead.
- Shape – Divide into 16 even pieces. Roll into balls, place spaced out on tray.
- Fork Time – Dip a fork in water and press down each biscuit to flatten. Go gently—you want defined ridges, not pancakes.
- Bake – 15–20 mins until very pale golden. The bottoms should just turn golden, tops will stay pale.
- Cool – Leave on tray 2 mins (they’re fragile!) then move to a wire rack.

TIPS FROM MY KITCHEN
- I use a small cookie scoop to portion—keeps the size consistent for even baking.
- Fork a crosshatch pattern instead of one press for a neater finish.
- For chocolate version, I add a pinch of instant coffee—brings out the cocoa beautifully.
- If you’re gifting them, drizzle with white chocolate once cool. So simple, so fancy-looking.
STORAGE + SERVING
- Room Temp: Airtight tin, up to 7 days. They’ll soften slightly but still hold up.
- Freezer: Freeze unbaked dough balls up to 3 months. Bake from frozen with 2–3 mins extra.
- Serve With: Proper English tea or a scoop of lemon curd on the side. Also great dunked in hot chocolate (don’t judge me).
FREQUENTLY ASKED QUESTIONS
Q: Why are they called fork biscuits?
A: It’s all about that fork press before baking—it flattens the dough and gives them their signature look.
Q: Can I make them ahead?
A: Absolutely. I often make and freeze the dough balls—just bake straight from frozen.
Q: Can I double the batch?
A: Yes, but bake in batches or they’ll spread into each other.
Q: Do they keep their shape well?
A: Yes, as long as your butter isn’t too soft and you don’t overwork the dough.
Q: Are they meant to be soft or crisp?
A: Somewhere in the middle—crumbly and short inside with a light snap on the outside.
Try More Recipes:
- Mary Berry Ginger Oat Crunch Biscuits
- Mary Berry Butter Biscuits
- Mary Berry Cinnamon Biscuits
- Mary Berry Abbey Biscuits
- Mary Berry Empire Biscuits Recipe
Mary Berry Fork Biscuits
Course: DessertsCuisine: BritishDifficulty: Easy16
servings10
minutes15
minutes120
kcalLight, Buttery, And Melt-In-The-Mouth—These Fork Biscuits Are Teatime Classics With Endless Flavour Twists.
Ingredients
100g unsalted butter, softened
50g caster sugar
150g self-raising flour
Directions
- Preheat oven to 180°C/fan 160°C/gas 4. Lightly grease 2 baking trays.
- Beat butter until soft. Add sugar, mix. Stir in flour and bring together into a dough.
- Divide into 16 balls. Place on tray, spaced apart.
- Dip a fork in water and gently press each ball to flatten.
- Bake 15–20 mins until pale golden. Cool on tray 2 mins, then rack.
Notes
- I use a small cookie scoop to portion—keeps the size consistent for even baking.
- Fork a crosshatch pattern instead of one press for a neater finish.
- For chocolate version, I add a pinch of instant coffee—brings out the cocoa beautifully.
- If you’re gifting them, drizzle with white chocolate once cool. So simple, so fancy-looking.