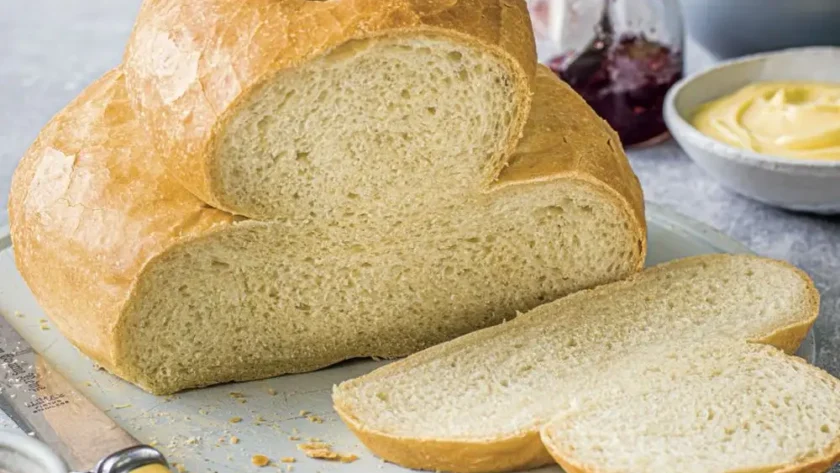
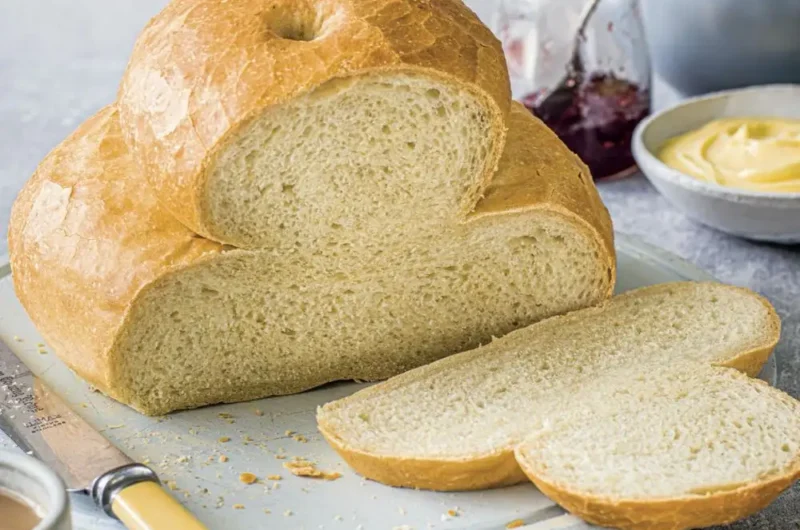
There’s something undeniably satisfying about baking a cottage loaf. That old-fashioned top-knot shape feels like something straight out of The Wind in the Willows. I remember the first time I tried this—on a drizzly Sunday, using my nan’s cracked mixing bowl—and I completely forgot the second rise. The loaf looked like a flat mushroom wearing a hat. Tasted fine, but the structure? Chaos.
Second go, I got clever. Slowed down, trusted the proofing, and finally nailed that domed, golden crust with a cloud-soft inside. If you’ve ever tried to make your own and ended up with a bread blob or a top that slid off mid-bake (been there), let me show you how I fixed that.
Why This One Works So Well
Most cottage loaf recipes don’t talk enough about tension. No, not emotional tension—dough tension. That final shaping, when you create the two balls and press them together, needs a bit of confidence. I gently roll the dough on the counter to create a smooth outer skin, which helps it hold its shape in the oven.
Also: Mary’s recipe uses warm water and melted butter, which makes for a dough that’s pliable but not greasy. The crust ends up golden and just crisp enough, and the inside is soft without turning gummy. I’ve tried with oil instead of butter—it just doesn’t have the same lift or flavour.
INGREDIENTS + WHY THEY MATTER
- Bread Flour (450g) – High protein, which builds the gluten network. Tried it once with plain flour… ended up with a squat, sad pancake loaf.
- Fast-acting Dried Yeast (7g) – Perfect for a same-day bake. Just don’t let it touch the salt directly or it sulks.
- Salt (1 tsp) – Crucial for flavour and structure. Skipped it once, never again.
- Salted Butter (40g), melted – Adds flavour and helps tenderise the crumb. I prefer salted here—balances the yeastiness.
- Warm Water (300ml) – Just warm to the touch. Too hot, and it’ll kill the yeast.
- Egg + Milk Glaze – Gives that beautiful glossy, golden finish. You can skip it, but you’ll miss the shine.
Making It Yours (Without Ruining It)
- Egg-free: Brush with milk or a mix of milk + maple syrup for shine.
- Gluten-free: Honestly, I haven’t found a GF flour that keeps the stacked shape—mine slumped like a bad snowman. Try a tin-baked version if you must.
- Flavoured loaf: Add 1 tsp dried rosemary or thyme to the flour mix. Smells lovely toasted.
- Mini rolls: Bake the dough as 8 rolls instead of a stacked loaf—12–15 mins at same temp.
MISTAKES I’VE MADE (AND HOW TO AVOID THEM)
| What Went Wrong | Why It Happens | How to Fix It |
|---|---|---|
| Top ball slid off mid-bake | Not enough dough tension | Roll dough tight and press firmly |
| Pale crust | Didn’t egg wash well | Be generous with that glaze |
| Dense interior | Under-proofed after shaping | Let it really puff before baking |
HOW TO MAKE MARY BERRY’S WHITE COTTAGE LOAF
- Mix the Dough – Combine flour, yeast, salt, melted butter, and warm water. I mix it by hand—more satisfying. Dough should feel soft but not stick like chewing gum.
- Knead (4–5 mins) – Until smooth and springy. I use the heel of my hand and give it a proper workout.
- First Rise – In an oiled bowl, covered. Mine takes 1 hour near the radiator. Should double in size.
- Shape – Punch it down, cut off ¼ for the top. Shape both parts into taut balls.
- Stack and Press – Place small ball on top of larger. Press a floured spoon handle vertically through both. That anchors it.
- Second Rise (35–45 mins) – Cover loosely in a big bag or cling film tent. Should puff up nicely.
- Glaze and Bake (20–25 mins at 220°C/425°F) – Brush with beaten egg + milk. Bake until deep golden and hollow when tapped underneath.
- Cool – Let the steam escape fully before slicing, or the inside will be gummy.
TIPS FROM MY KITCHEN
- I proof it inside my switched-off oven with the light on—it’s the perfect warm spot.
- If the top starts to lean, I gently nudge it upright during the second proof.
- I use my old battered baking sheet—it holds heat better than non-stick.
- For a deeper crust, I pop a tray of hot water in the oven base to steam it.
STORAGE + SERVING
- Room Temp: Keeps 2–3 days in a bread bin or airtight container.
- Freezer: Slice, wrap in foil and freeze up to 2 months. Toast straight from frozen.
- Serving ideas: Thick butter, sharp cheddar, soup dipper, or ham sandwich with chutney. It’s magic.
FAQs
Q: Why is it called a cottage loaf?
A: It’s a traditional British shape—two round loaves stacked. No one really knows why, but it’s been around since at least the 19th century.
Q: Can I make it in a loaf tin?
A: You can, but it won’t be a cottage loaf. Still tasty though—bake about 30 mins and check with a skewer.
Q: My loaf didn’t rise much—what went wrong?
A: Check your yeast’s not expired, and make sure the water wasn’t too hot. Also—don’t skip the second proof.
Q: Can I make it with whole wheat flour?
A: I’ve done half white, half whole wheat—it works but needs a touch more water and a longer proof.
Q: How do I stop the top loaf falling off?
A: Make sure to press the spoon handle right through to the tray. That anchors it and helps it rise evenly.

Try More Recipes:
Mary Berry White Cottage Loaf
Course: BreadCuisine: UK1
loaf20
minutes1
hour45
minutes180
kcalFirst time, my cottage loaf top slid off mid-bake—lesson learned. Here’s how I finally got it right.
Ingredients
- For the Dough:
3½ cups (450g) bread flour
1 × ¼-ounce (7g) packet fast-acting dried yeast
3 tablespoons (40g) salted butter, melted
1 teaspoon salt
1 cup + 3 tablespoons (300ml) warm water
- For the Glaze:
1 extra-large egg, beaten
1 tablespoon milk
Directions
- Combine flour, yeast, salt, melted butter, and warm water in a bowl. Mix and knead until soft and elastic.
- Proof in an oiled bowl for 1–1½ hours until doubled.
- Punch down dough. Cut off a quarter, shape both into balls.
- Stack small ball on top of larger. Press floured spoon handle vertically through both.
- Cover and rise again for 35–45 mins.
- Glaze with egg + milk.
- Bake at 220°C (425°F) for 20–25 mins until golden and hollow-sounding.
- Cool on wire rack before slicing.
Notes
- I proof it inside my switched-off oven with the light on—it’s the perfect warm spot.
- If the top starts to lean, I gently nudge it upright during the second proof.
- I use my old battered baking sheet—it holds heat better than non-stick.
- For a deeper crust, I pop a tray of hot water in the oven base to steam it.