
I’ve baked this chocolate buttercream cake for birthdays, last‑minute visitors, and one slightly chaotic Sunday where I realised halfway through that I’d promised dessert and had very little time (or patience). The first time I made it, I rushed the cocoa paste and ended up with a cake that tasted fine—but not chocolatey. That was the turning point.
Once I slowed down and actually bloomed the cocoa properly, everything changed. The sponge turned darker, richer, and unmistakably chocolatey, even before the buttercream went anywhere near it. Let me show you what made the difference—and what nearly ruined it.
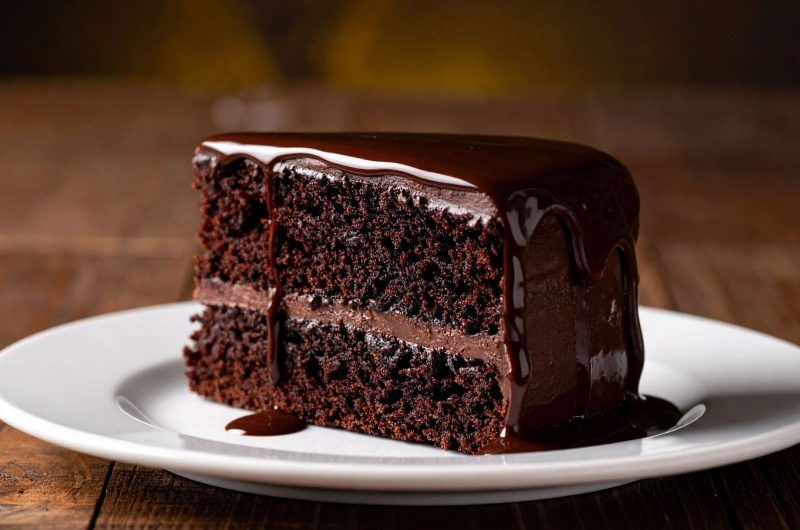
Mary Berry Chocolate Buttercream Cake Recipe – Deep Chocolate, Foolproof & Party-Ready
Course: DessertCuisine: British10
servings20
minutes25
minutes550
kcalIngredients
Cake
40g cocoa powder
4 tbsp boiling water
175g butter or baking spread
175g caster sugar
175g self‑raising flour
1½ tsp baking powder
3 eggs
Buttercream
60g butter
30g cocoa powder
250g icing sugar
3 tbsp milk
Directions
- Preheat oven and prepare tins.
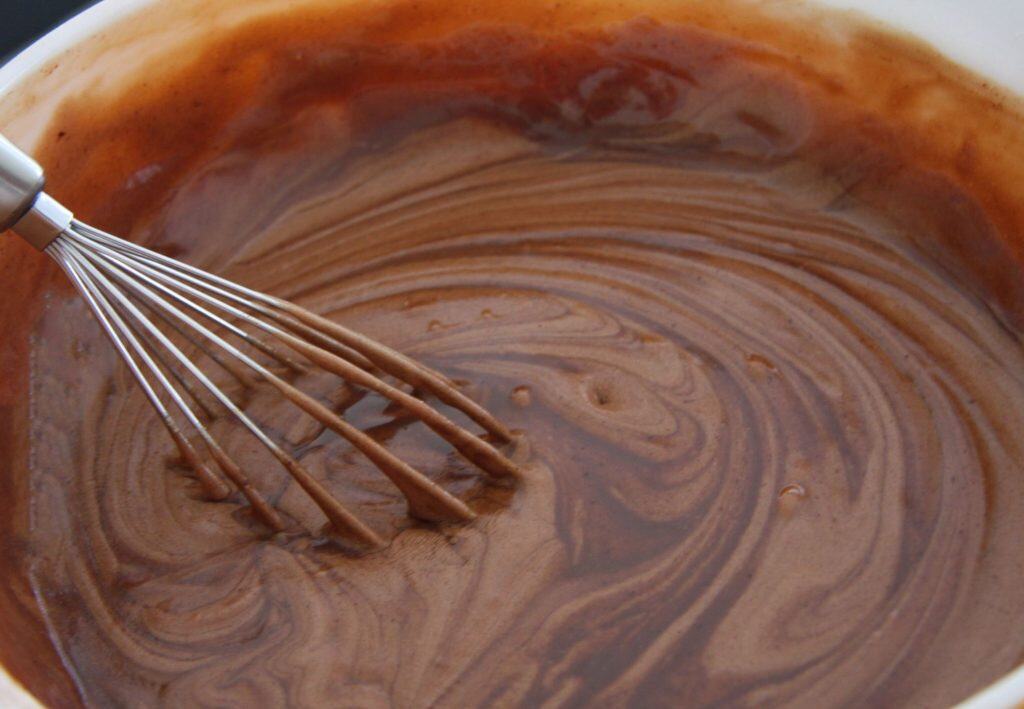
- Make cocoa paste with boiling water.
- Beat all cake ingredients together.
- Bake until springy; cool fully.
- Make buttercream and assemble.
THE SECRET BEHIND THIS BAKE
This cake works because it doesn’t overcomplicate things. Mary’s all‑in‑one method keeps the crumb soft and even, but the real magic is the cocoa paste. Most recipes skip this step or treat it casually—I didn’t think it mattered either, until I compared two versions side by side.
Blooming the cocoa with boiling water releases flavour compounds that dry cocoa powder just can’t deliver on its own. It’s a small step that gives you a noticeably deeper chocolate sponge, without adding melted chocolate or extra fat.
CAKE INGREDIENTS
- Cocoa Powder – This is the backbone of the cake. I once used cheap cocoa and regretted it instantly—go decent here.
- Boiling Water – Activates the cocoa. Lukewarm water didn’t do the job properly.
- Butter or Baking Spread – Butter gives better flavour; spread gives a slightly lighter crumb.
- Caster Sugar – Dissolves quickly, keeping the sponge fine‑textured.
- Self‑Raising Flour – Reliable rise without fiddling.
- Baking Powder – Extra lift for a soft sandwich crumb.
- Eggs – Bind and lift. Cold eggs slowed the mix noticeably.
- Icing Sugar (Buttercream) – Must be sifted. I skipped once. Never again.
MAKING IT YOURS (WITHOUT RUINING IT)
Dairy‑Free (Tested):
- Use dairy‑free baking spread and oat milk.
- Buttercream works with plant butter, but beat longer for fluffiness.
Lighter Chocolate:
- Swap half the cocoa in the sponge for plain flour for a milder result.
Celebration Upgrade:
- Add a thin layer of raspberry jam between sponge and buttercream—tested and excellent.
HOW TO AVOID MISTAKES
| What Went Wrong | Why It Happens | How to Fix It |
|---|---|---|
| Pale chocolate flavour | Cocoa not bloomed | Use boiling water, make a paste |
| Dense sponge | Overmixing | Stop as soon as smooth |
| Greasy buttercream | Butter too soft | Cool slightly, then re‑whip |
HOW TO MAKE MARY BERRY’S CHOCOLATE BUTTERCREAM CAKE
- Preheat oven to 180°C / 160°C fan. Grease and line two 20cm tins.
- Mix cocoa powder with boiling water to form a smooth paste.
- Add all sponge ingredients plus cocoa paste to a bowl.
- Beat for 2 minutes until smooth and glossy.
- Divide between tins and bake 20–25 minutes until springy.
- Cool completely.
- Beat butter, icing sugar, and cocoa for buttercream. Add milk gradually.
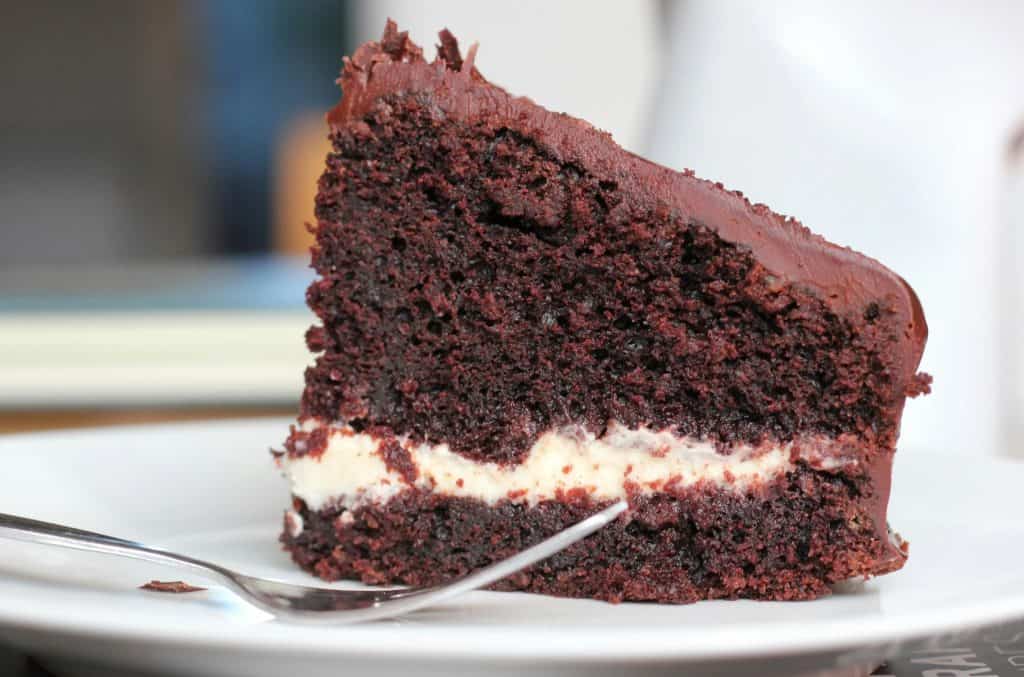
- Sandwich cakes with half the buttercream, spread the rest on top.
BIRTHDAY & CELEBRATION VARIATION BOX
Turning This Into a Proper Celebration Cake
- Chocolate Birthday Upgrade
Split the sponges and add a thin layer of raspberry or strawberry jam under the buttercream. It cuts through the richness beautifully and makes the cake feel party-ready. - Chocolate Orange Version (Tested)
Add the finely grated zest of 1 orange to the sponge batter and replace 1 tbsp of the milk in the buttercream with orange juice. Chocolate orange fans will love this. - Sprinkle Finish for Kids’ Parties
Ice the top generously, then add sprinkles while the buttercream is still soft so they actually stick (learned that the hard way). - Extra-Chocolate Finish
Finish with chocolate curls or shavings. I use a vegetable peeler on a bar of dark chocolate straight from the fridge.
MY TIPS FOR THIS CAKE
- I weigh the batter into tins for even layers.
- My fan oven runs hot—I check at 18 minutes.
- A metal palette knife gives the best swirl on top.
STORING THE CAKE
- Room Temp: Keeps 4 days in an airtight container.
- Freezing: Freeze un‑iced sponges up to 3 months.
- Serve With: Tea, coffee, or fresh berries to cut the richness.
Frequently Asked Questions
Why did my cake sink in the middle?
This usually comes down to either underbaking or opening the oven door too early. Chocolate sponges in particular need that final bit of heat to set the structure, so always test the centre with a skewer before taking the cakes out. If it comes out clean and the sponge springs back, you’re safe.
Can I make this as a traybake?
Yes, this recipe adapts really well to a traybake. Pour the batter into a lined 30 × 23cm tin and bake for around 30–35 minutes. Let it cool completely before spreading the buttercream over the top so it doesn’t melt.
My buttercream is too stiff or too runny. How do I fix it?
If the buttercream feels stiff, add milk a teaspoon at a time and beat well until it loosens. If it’s too soft or runny, it usually means the butter was overly warm—beat in more sifted icing sugar until the texture is smooth and spreadable again.
Other Recipes You May Like
- Mary Berry Celebration Birthday Cake Recipe
- Mary Berry Vanilla Cupcakes Recipe
- Mary Berry Lime and Coconut Cake Recipe