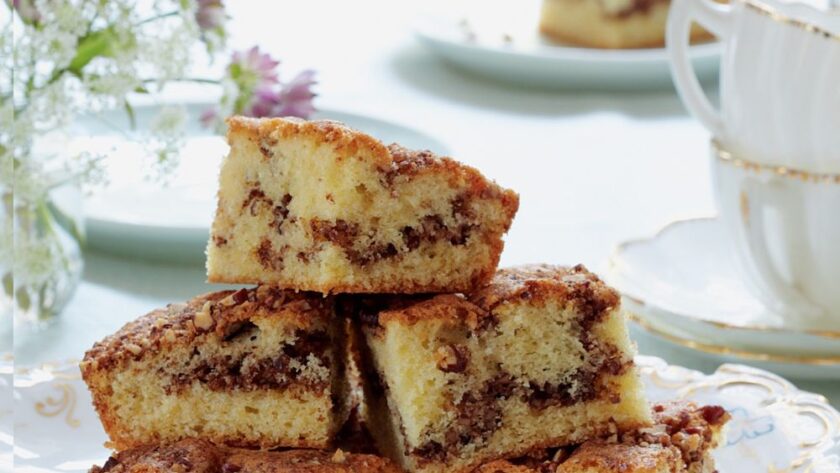
I wasn’t expecting these to go this fast. Honestly, I baked a tray to test the swirl and by the time I came back from making tea, three were already gone. Apparently, the smell of toasted pecans and cinnamon wafting through the house is too much for anyone to resist.
The first time I made this, I overdid the swirl—turns out, more isn’t always better. It blurred the ripple into a pecan-brown mush. The flavour was there, but the look? Bit of a dog’s breakfast. Let me show you how I fixed that and got the marbled, nutty beauty Mary intended.
What Makes This Recipe Special
Most ripple cakes skimp on the swirl mix. Not this one. You get bold cinnamon warmth, crunchy pecans, and soft, buttery sponge in every bite—if you layer and swirl it just right.
The key? Grinding some pecans and chopping others. That way you get both deep flavour and texture. And don’t underestimate that muscovado sugar. It brings a rich, caramelly depth that white sugar simply can’t fake.
INGREDIENTS + WHY THEY MATTER
- Butter (225g, softened) – Gives richness and a tender crumb. Softened is key—cold butter ruins the mix, and melted gives you a greasy bake.
- Self-raising flour (225g) – Built-in lift. If you use plain by accident (like I once did…), the sponge falls flat.
- Caster sugar (225g) – Fine enough to cream well, giving the sponge a light texture.
- Eggs (4 large) – Structure and moisture. Room temp works best—they blend better.
- Baking powder (2 tsp) – Even though we’re using self-raising, this gives extra insurance for rise.
- Vanilla extract (1 tsp) – Adds warmth and balance against the cinnamon.
- Pecans (100g) – 75g ground for ripple, 25g chopped for top. The combo of nut dust and crunch is chef’s kiss.
- Ground cinnamon (1 heaped tsp) – Gives that cinnamon roll magic.
- Light muscovado sugar (25g) – Brings moisture and depth. I swapped in dark once—tasted great but made the ripple too intense.
Making It Yours (Without Ruining It)
- Gluten-Free – Swap the self-raising flour for a GF blend with xanthan gum. Add 1 tsp extra baking powder.
- Egg-Free – I tested with 4 tbsp aquafaba + 1 tbsp yogurt per egg. The texture was slightly denser but still held up.
- Nut Variations – Walnuts work in a pinch but taste more bitter. Pecans really shine here.
- Add-ins – A handful of chopped dates or a few dark chocolate chunks folded into the top layer? Lush.
MISTAKES I’VE MADE (AND HOW TO AVOID THEM)
| What Went Wrong | Why It Happens | How to Fix It |
|---|---|---|
| Ripple disappeared | Over-swirled the layers | Use a light hand—3–4 swirls max |
| Greasy bottom | Butter wasn’t soft, just slightly melted | Let it soften at room temp |
| Pecans turned soggy | Didn’t toast them before grinding | Lightly toast for 5 mins at 160°C first |
| Cake was flat | Used plain flour instead of self-raising | Always double-check your flour bag |
HOW TO MAKE MARY BERRY’S PECAN AND CINNAMON RIPPLE SQUARES
- Preheat oven to 180°C (160°C fan). Grease and line a 30×23cm traybake tin.
- Make ripple mix: Toast pecans if you like, then blitz 75g until fine. Mix with cinnamon and muscovado sugar. Chop the rest of the pecans.
- Mix sponge: Beat butter, sugar, eggs, flour, baking powder, and vanilla until light and fluffy.
- Layer up: Spread half the sponge in tin. Scatter two-thirds of ripple mix over. Dollop the rest of the sponge. Swirl gently with the handle of a teaspoon.
- Top it: Sprinkle remaining ripple mix + chopped pecans over the top.
- Bake for 25–30 mins until golden and firm to the touch.
- Cool for 5–10 mins in tin, then lift out and cool fully before slicing.

TIPS FROM MY KITCHEN
- I blitz the pecans a day ahead—it saves time and keeps the morning less chaotic.
- My fan oven browns the edges fast—so I cover loosely with foil for the last 5 mins.
- I always use my metal traybake tin—bakes more evenly than ceramic.
STORAGE + SERVING
- Keeps: 4–5 days in an airtight tin (if it lasts that long).
- Freezes: Beautifully. Wrap well and freeze up to 3 months.
- To serve: Lovely with vanilla ice cream or thick Greek yogurt and a drizzle of maple syrup.
- Reheat: A quick 10 seconds in the microwave brings back that just-baked warmth.
FAQs
Q: Can I make this ahead of time?
A: Absolutely. It actually tastes better the next day once the flavours settle. Just store in a tin.
Q: What’s the best way to chop pecans?
A: I pulse in a mini processor. Don’t overdo it—you want bits, not dust.
Q: Can I halve the recipe?
A: Yes, but reduce baking time by 5–8 minutes. Use a smaller square tin (roughly 20cm).
Q: Is dark brown sugar okay?
A: It works but makes the flavour much bolder—less cinnamon roll, more sticky toffee.
Q: How do I know it’s done baking?
A: It’ll feel springy and a skewer should come out clean. The top should be golden with toasty nuts.
Try More Recipes:
- Mary Berry Chocolate Birthday Cake
- Mary Berry Raspberry Parfait Recipe
- Mary Berry St Clements Creams
- Mary Berry White Chocolate and Pistachio Blondies

Mary Berry Pecan And Cinnamon Ripple Squares
Course: Desserts, CakesCuisine: BritishDifficulty: Easy12
servings15
minutes30
minutes290
kcalSoft sponge, sweet cinnamon, and nutty crunch—these ripple squares are a cosy classic perfect for sharing (or not!).
Ingredients
225g butter, softened
4 large eggs
225g self-raising flour
225g caster sugar
2 tsp baking powder
1 tsp vanilla extract
- For the Ripple
1 heaped tsp cinnamon
100g pecans (75g ground, 25g chopped)
25g light muscovado sugar
Directions
- Preheat oven to 180°C/160°C fan. Grease and line a 30×23cm tin.
- Mix ripple ingredients (grind 75g pecans, mix with sugar and cinnamon). Chop the rest.
- Beat sponge ingredients until smooth.
- Layer: half sponge, two-thirds ripple, rest of sponge, swirl. Top with ripple and chopped pecans.
- Bake 25–30 mins. Cool in tin, then on rack. Slice once fully cooled.
Notes
- I blitz the pecans a day ahead—it saves time and keeps the morning less chaotic.
- My fan oven browns the edges fast—so I cover loosely with foil for the last 5 mins.
- I always use my metal traybake tin—bakes more evenly than ceramic.