I made this one for a birthday I forgot I agreed to bake for—classic me. No time to mess about with complicated layers or fancy tricks. Just needed something that looked impressive but was actually doable in under an hour (with clean hands and a cold cup of tea).
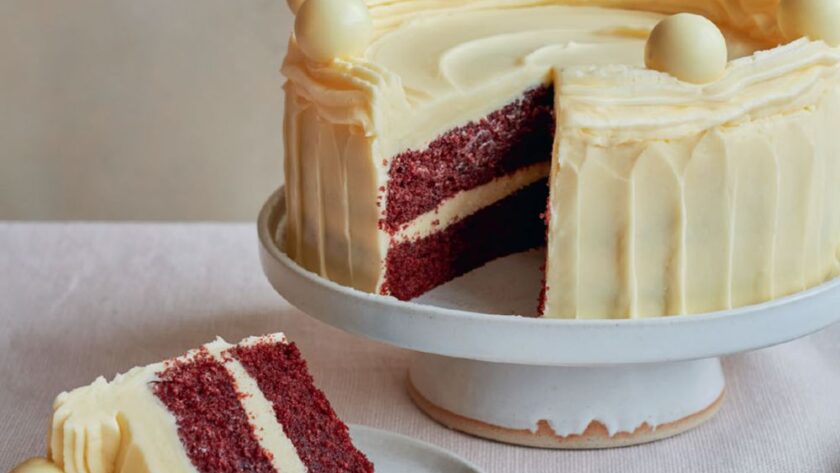
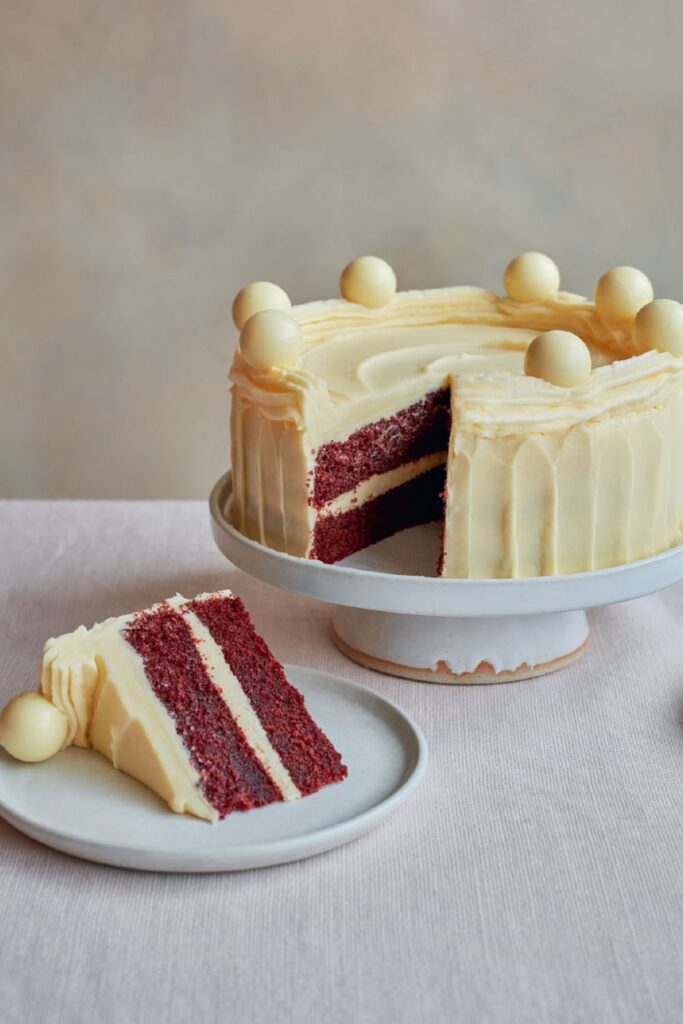
This red velvet cake delivered. Deep, cocoa-rich sponge with that perfect not-too-sweet mascarpone buttercream. And those little white chocolate truffle balls on top? Completely stole the show. I didn’t even get a slice—just a crumb and three people asking for the recipe.
That said, I did nearly split the buttercream the first time by going too hard with the mixer. Let me show you how to avoid that and get a red velvet that’s all drama on the outside and all comfort on the inside.
WHY THIS ONE WORKS SO WELL
It’s all about balance. The cocoa and buttermilk give the sponge a subtle tang that keeps it from being too sweet. The oil keeps it moist without turning it heavy, and the food colouring (if you go gel or paste) gives you that deep, classic red without wrecking the texture.
The icing is mascarpone-based, which gives it a lovely creamy tang. Not as cloying as cream cheese frosting can sometimes be. And you don’t need piping skills to make it look great—a palette knife and a few truffle balls go a long way.
INGREDIENTS + WHY THEY MATTER
- Plain Flour (250g) – The base of the sponge. Sift it to keep things light.
- Cocoa Powder (1 tbsp) – Just enough for that subtle red velvet bitterness. More would make it a full-on chocolate cake.
- Baking Powder + Bicarb – Both are needed here. The buttermilk needs the bicarb to activate properly.
- Light Muscovado Sugar (250g) – Adds moisture and a slight caramel depth.
- Buttermilk (200ml) – Reacts with the bicarb for rise and gives that signature tang.
- Sunflower Oil (150ml) – Keeps the cake moist without weighing it down.
- Vanilla Extract (2 tsp) – Helps round out the flavours.
- Red Food Colouring Gel (1 tbsp) – Go for gel or paste. Liquid will water down the batter.
- Eggs (2 large) – Room temp if possible. Adds structure and richness.
For the Buttercream:
- Butter (250g, softened) – Needs to be really soft or you’ll end up with lumps.
- Vanilla Extract (2 tsp) – Lifts the icing so it’s not too heavy.
- Icing Sugar (300g) – Sift it, always.
- Mascarpone (250g) – Use full-fat. Light mascarpone won’t hold its shape.
For Decoration:
- White Chocolate Truffle Balls (8) – Adds a festive touch. Ferrero-style work well.
MAKING IT YOURS (WITHOUT RUINING IT)
- No buttermilk? Use 200ml milk with 1 tbsp vinegar or lemon juice. Let it sit 5–10 mins before using.
- Want deeper colour? Add a tiny pinch of black gel colouring with the red. Makes the red richer.
- Don’t do mascarpone? You can use full-fat cream cheese, but go gentle—it’s saltier and less stable.
- Make it gluten-free? I tried this with Doves Farm plain GF flour plus an extra egg—it worked but was slightly more crumbly.
MISTAKES I’VE MADE (AND HOW TO AVOID THEM)
| What Went Wrong | Why It Happens | How to Fix It |
|---|---|---|
| Icing split and went grainy | Mascarpone overmixed or too cold | Gently fold it in last, and don’t overdo it |
| Cake looked dull, not red | Used liquid colouring | Use gel or paste, and don’t be shy |
| Buttercream too soft | Butter or mascarpone too warm | Chill for 15 minutes before piping |
| Sponge too dense | Overmixed batter or old bicarb | Mix just until smooth and use fresh raising agents |
HOW TO MAKE MARY BERRY’S RED VELVET CAKE
Preheat oven to 180°C (160°C fan). Grease and line two 20cm cake tins.
In a large bowl, mix the flour, cocoa, baking powder, bicarb, and muscovado sugar.
In a jug, combine buttermilk, oil, vanilla, food colouring, water, and eggs.
Pour the wet into the dry and whisk until smooth and evenly red.
Divide between tins and smooth the tops.
Bake for 25–30 minutes, until risen and pulling slightly from the sides.
Cool in the tins for 10 minutes, then turn out and cool fully on a wire rack.
To make the icing, beat the butter with vanilla and half the icing sugar until smooth.
Add the rest of the sugar, then gently stir in the mascarpone—don’t overmix.
Spread one-third of the icing over the first sponge.
Top with the second, then apply a thin crumb coat around the sides. Chill 30 minutes.
Ice the cake fully, smoothing upwards with a palette knife for texture.
Pipe a border around the top and finish with truffle balls.
TIPS FROM MY KITCHEN
- I always mix the red colouring into the wet ingredients first—it blends better and gives a more even colour.
- If you forget to soften the butter, 10 seconds in the microwave (watch it) does the trick.
- Let the cake cool completely or the icing will slide right off. I learned that the sticky way.
- A cold metal palette knife gives the icing lovely clean edges.
STORAGE + SERVING
- Store: In the fridge, tightly covered, for up to 3 days.
- Freeze: Wrap slices tightly and freeze for up to 2 months. Thaw overnight in the fridge.
- Serve: At room temperature for the best texture. Cold icing tastes firmer, so let it sit out a bit.
FREQUENTLY ASKED QUESTIONS
Q: Can I make this as a single-layer cake?
A: You can, but reduce the batter or use a deep tin and increase baking time slightly. Keep an eye on the middle.
Q: Can I colour this naturally?
A: Beetroot powder gives a reddish hue, but it’s not the same vivid colour. Still tasty though.
Q: My sponge came out brown, not red—what happened?
A: Usually it’s from using too little food colouring or the wrong kind. Use gel or paste and mix well.
Q: Can I make the cake a day ahead?
A: Definitely. It actually gets better after resting overnight in the fridge.
Q: What’s the best way to get clean slices?
A: Wipe your knife between cuts, and chill the cake slightly before slicing.
Try More Recipes:
- The Richest, Most Decadent Mary Berry Chocolate Recipes
- How to Throw an Elegant Tea Party with Mary Berry’s Best Recipes
- Mary Berry Clementine Crème Brûlée Recipe
Mary Berry Red Velvet Cake Recipe
Course: DessertsCuisine: BritishDifficulty: Easy12
servings20
minutes30
minutes390
kcalThis red velvet cake is all about contrast—rich cocoa sponge, creamy mascarpone icing, and a striking pop of red. Finished with white chocolate truffles, it looks like you spent hours. You didn’t.
Ingredients
- For the Cake:
250g plain flour
1 tbsp cocoa powder
2 tsp baking powder
1 tsp bicarbonate of soda
250g light muscovado sugar
200ml buttermilk
150ml sunflower oil
2 tsp vanilla extract
1 tbsp red food colouring gel (or ¼ tsp paste)
2 large eggs
Butter, for greasing
8 white chocolate truffle balls, for decoration
- For the Buttercream Icing:
250g butter, softened
2 tsp vanilla extract
300g icing sugar
250g full-fat mascarpone cheese
Directions
- Preheat oven to 180°C (160°C fan). Grease and line two 20cm round tins.
- Mix flour, cocoa, baking powder, bicarbonate of soda, and sugar in a large bowl.
- In a jug, whisk together buttermilk, oil, vanilla, red food colouring, water, and eggs.
- Pour wet mixture into the dry ingredients and whisk until smooth and evenly red.
- Divide the batter between the tins and level the tops.
- Bake for 25–30 minutes until the sponges pull slightly from the sides and spring back to touch.
- Cool in tins for 10 minutes, then turn out onto a wire rack and cool completely.
- To make icing, beat butter with vanilla and half the icing sugar until smooth.
- Add the rest of the icing sugar, then gently stir in mascarpone until just combined.
- Spread a third of the icing on the first sponge. Top with the second.
- Apply a thin crumb coat and chill the cake for 30 minutes.
- Ice the full cake, using a palette knife to add texture.
- Pipe a border on top and decorate with white chocolate truffles.
Notes
- Use gel colouring for a bright, even red
- Fold in mascarpone gently—don’t overmix
- Chill the cake briefly before decorating for sharper edges