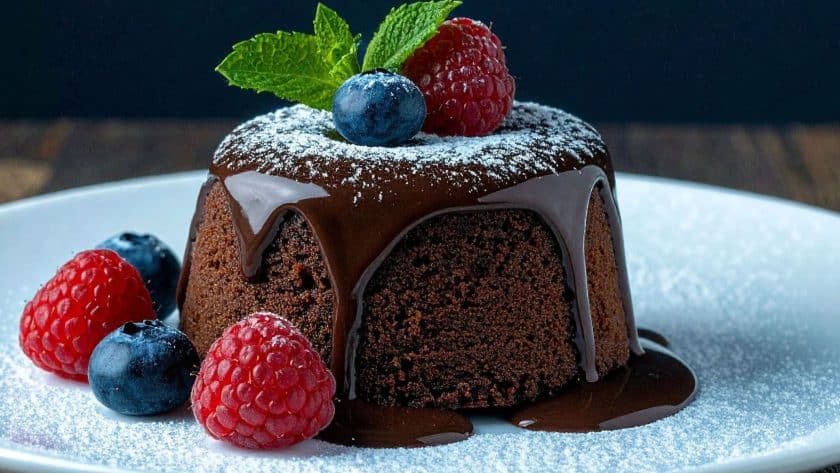
This Mary Berry White Chocolate and Raspberry Cake is one of those recipes that quietly steals the show. It looks simple, bakes quickly, and slices beautifully — yet every time I serve it, someone asks for the recipe. I’ve made it for afternoon tea, bake sales, and last-minute guests, and it has never let me down.
The balance here is what makes it special. The sponge is light and tender thanks to Mary’s all-in-one method, the raspberries bring just enough sharpness to cut through the sweetness, and the white chocolate melts into little pockets of creamy richness. It’s not heavy, not cloying, and not fussy — just a proper, reliable traybake you can trust.
If you want a cake that looks generous, tastes special, and still comes together in under an hour, this is it.
Mary Berry White Chocolate and Raspberry Cake Recipe – Soft, Fruity, Foolproof Traybake
Course: DessertCuisine: British4
servings15
minutes40
minutes400
kcalIngredients
225g softened butter or baking spread
225g caster sugar
275g self-raising flour
1 tsp baking powder
4 large eggs
4 tbsp milk
100g white chocolate chips
175g fresh raspberries
Directions
- Preheat oven to 180°C (160°C fan). Line a traybake tin.
- Beat all ingredients except chocolate and raspberries for 2 minutes.
- Fold in chocolate and raspberries gently.
- Bake for 35–40 minutes until golden and springy.
- Cool fully before slicing or icing.
- Notes
- Uses Mary Berry’s all-in-one method
- Freezes well un-iced
- Icing is optional — icing sugar dusting also works
Why You’ll Love This Cake
This recipe avoids the most common traybake problems: dry sponge, sunken fruit, and uneven baking.
The higher flour ratio keeps the sponge sturdy but soft, so it supports the raspberries without collapsing. Folding the fruit in gently — and coating it lightly in flour — helps keep it suspended instead of sinking. And baking it in a shallow tray ensures even heat and a perfectly level bake.
I tested this with both butter and baking spread. Baking spread gives a slightly lighter crumb, while butter adds richness. Both work — which is exactly why this recipe is so dependable.
Cake Ingredients
- Baking spread or butter – Moist crumb and even rise
- Caster sugar – Dissolves quickly for a smooth sponge
- Self-raising flour + baking powder – Guarantees lift with heavy fruit
- Eggs – Structure and richness
- Milk – Softens the batter for a tender crumb
- White chocolate chips – Creamy sweetness throughout
- Fresh raspberries – Sharpness to balance the sugar
Optional buttercream adds a bakery-style finish, but the cake is just as good left plain.
Steps To Make The Cake
- Prepare the tin
Preheat the oven to 180°C (160°C fan). Grease and line a 30 × 23cm traybake tin. - Mix the batter
Place the butter, sugar, flour, baking powder, eggs, and milk into a large bowl. Beat for about 2 minutes until pale, smooth, and fluffy. - Add the extras
Gently fold in the white chocolate chips and raspberries with a spatula. - Bake
Spread the mixture evenly in the tin. Bake for 35–40 minutes until golden, springy, and a skewer comes out clean. - Cool completely
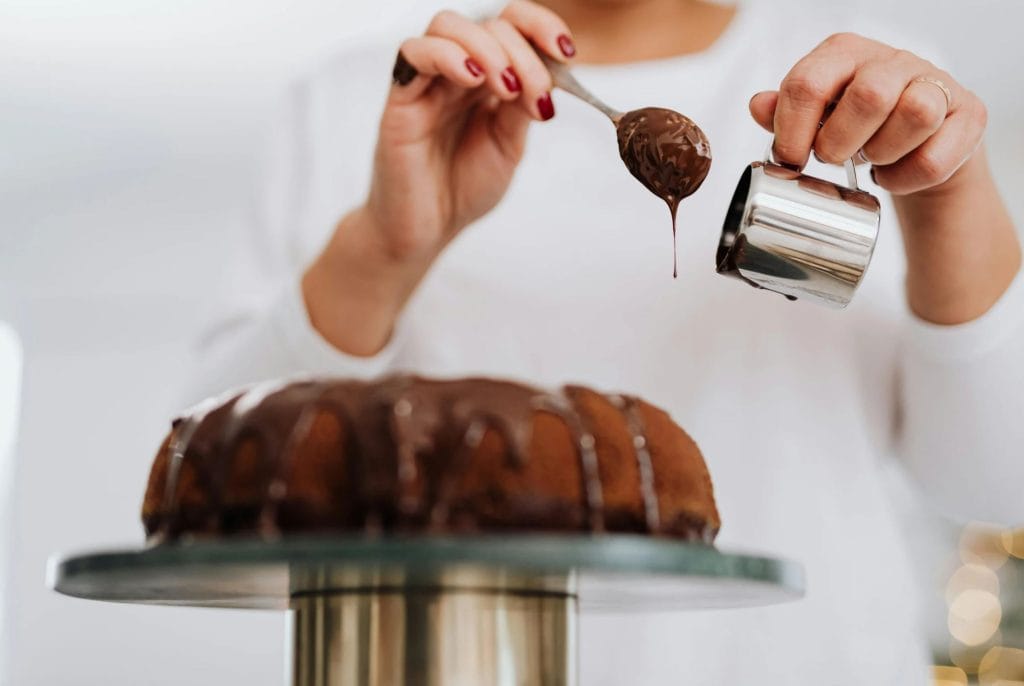
Leave the cake to cool fully in the tin before slicing or icing. - Ice (optional)
Beat butter, icing sugar, milk, and vanilla until light and creamy. Spread over the cooled cake and cut into squares.

Tips You May Like for This Cake
- Toss raspberries in a tablespoon of flour to stop them sinking
- Don’t overbeat once the flour is in — it toughens the sponge
- Frozen raspberries work well if added straight from the freezer
- For neat slices, chill the cake briefly before cutting
Other Dietary Versions
Dairy-Free Version
This one works very well.
Swaps I used:
- Dairy-free baking block (not spreadable margarine)
- Dairy-free milk (oat milk gave the best texture)
- Dairy-free white chocolate alternative
Results:
Light sponge, clean slices, and no greasiness. The dairy-free chocolate melts slightly more, so fold gently and don’t overbake.
Top tip: Chill before slicing — dairy-free cakes firm up beautifully once cool.
Gluten-Free Version
Works, but needs precision.
Swaps I tested:
- Gluten-free self-raising flour blend
- Added ½ tsp xanthan gum (essential)
Results:
Soft crumb and good rise, but slightly more delicate when warm.
What didn’t work:
Single-flour swaps (almond flour or plain GF flour without gum) — cake collapsed.
Best advice:
Cool completely before cutting and avoid frozen raspberries (too much moisture).
Mistakes to Avoid with This Cake
Cake sank in the middle
→ Oven door opened too early or underbaked. Always test the centre.
Raspberries at the bottom
→ Didn’t coat them lightly in flour or overmixed the batter.
Dry sponge
→ Overbaked or oven running hot. Check at 35 minutes.
Serve The Cake With These
This cake is excellent on its own, but especially good with:
- A cup of tea or coffee
- Clotted cream or crème fraîche
- Extra fresh raspberries on the side
It also works beautifully as a light dessert with softly whipped cream.
Storing the Cake
- Room temperature: Airtight container for up to 3 days
- Freeze: Un-iced cake freezes well for up to 3 months
- Defrost: At room temperature before icing or serving
Frequently Asked Questions
Can I use frozen raspberries instead of fresh?
Yes, frozen raspberries work well in this cake. Use them straight from the freezer and do not thaw first, as thawed berries release too much juice and can make the sponge soggy. You may need to add 3–5 minutes to the baking time, and the raspberries will bleed slightly more into the cake, which is completely normal.
How do I stop the raspberries and chocolate from sinking to the bottom?
Lightly tossing the raspberries and white chocolate chips in a tablespoon of flour before folding them into the batter helps keep them suspended. Also make sure the cake batter is thick and fluffy before adding them — an over-loose batter makes sinking more likely.
Can I skip the icing altogether?
Absolutely. This cake is designed to be lightly sweet and works beautifully without icing. For a simple finish, dust the cooled cake with icing sugar or leave it plain — it’s still moist and flavourful thanks to the fruit and chocolate.
What type of white chocolate works best?
Good-quality white chocolate chips or chopped white chocolate bars both work. Avoid “baking white chocolate” with a very low cocoa butter content, as it can stay chalky rather than melting gently into the cake.
Can I make this cake ahead of time?
Yes. This traybake keeps very well and actually improves after a few hours. You can bake it a day ahead, store it covered at room temperature, and ice it just before serving if you like.
Why did my cake turn out dry?
Overbaking is the most common cause. Traybakes can dry out quickly if left too long in the oven, especially around the edges. Check the cake as soon as the centre feels springy and a skewer comes out clean. Also make sure you’re measuring the flour accurately — too much flour will dry the cake.
Can I bake this in a different tin size?
Yes, but baking times will change. A deeper tin will need longer, while a larger, shallower tin will bake faster. Always rely on the skewer and spring-back test rather than time alone.
Does this cake travel well?
Very well. Once fully cooled, it’s sturdy enough for bake sales, picnics, and gifting. If iced, keep it in a single layer so the topping stays neat.
Can I turn this into cupcakes?
Yes. Divide the batter between lined cupcake cases and bake at the same temperature for 18–22 minutes. They’re lovely finished with a light vanilla or white chocolate buttercream.
Other Similar Recipes
- The Richest, Most Decadent Mary Berry Chocolate Recipes
- Mary Berry American Chocolate Wedding Cake Recipe
- Mary Berry Red Velvet Cupcakes