I have a soft spot for fudge.
Not the crumbly sort you sometimes find in seaside shops—lovely flavour, but it tends to shatter when you cut it. I mean the smooth, melt-in-your-mouth kind that feels almost like chocolate truffle.
My first attempt at making fudge at home years ago was… well, a disaster. I boiled sugar too long, the mixture seized, and I ended up with something closer to chocolate gravel than fudge.
Then I discovered this wonderfully simple fudge recipe. No thermometer, no sugar stages, and only three ingredients. I was slightly skeptical the first time I stirred it together in a small saucepan on my hob.
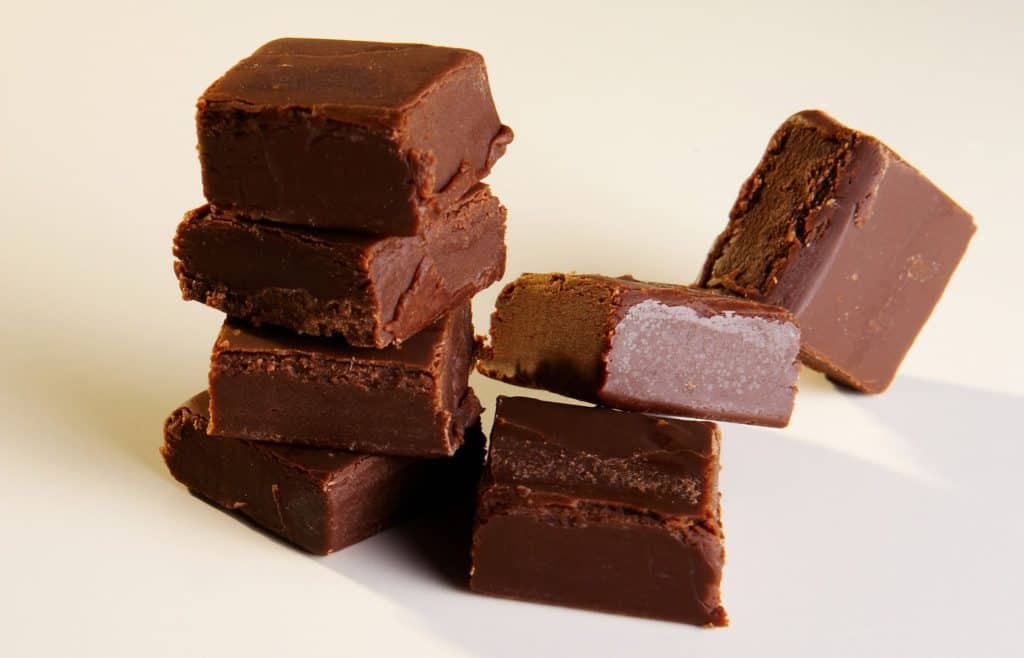
But once it cooled and I sliced that first square—perfectly smooth, glossy, and rich—I realised this might be the easiest sweet treat I’ve ever made.
If you need a quick homemade gift or a tray of something indulgent for guests, this one never fails.
Mary Berry Simple Fudge Recipe – Silky, Foolproof, and Only Three Ingredients
Course: DessertCuisine: British36
servings10
minutes5
minutes155
kcalIngredients
3 cups chocolate chips (semi-sweet or milk chocolate)
410ml sweetened condensed milk
1 teaspoon vanilla extract
Directions
- Line a 20 x 20cm baking pan with parchment paper.
- Add chocolate chips and sweetened condensed milk to a saucepan.
- Heat over low heat, stirring constantly.
- When chocolate begins melting, stir in vanilla extract.
- Continue stirring until mixture is smooth and glossy.
- Pour into prepared pan and spread evenly.
- Allow to set at room temperature for 4 hours.
- Remove from pan and cut into 36 squares.
The Secret Behind This Simple Fudge Recipe
Classic fudge usually relies on boiling sugar to very specific temperatures. Miss it by a few degrees and the texture changes completely.
This version works differently.
The magic comes from sweetened condensed milk, which already contains sugar and milk solids cooked to the perfect consistency. When it melts with chocolate, it creates that creamy fudge texture without any complicated steps.
One thing surprised me during testing though: low heat matters enormously.
The first time I tried rushing the melting process on medium heat, the chocolate thickened unevenly. Keeping the heat gentle produced a smooth, glossy mixture every time.
Sometimes patience really does pay off in baking.
Important Ingredients
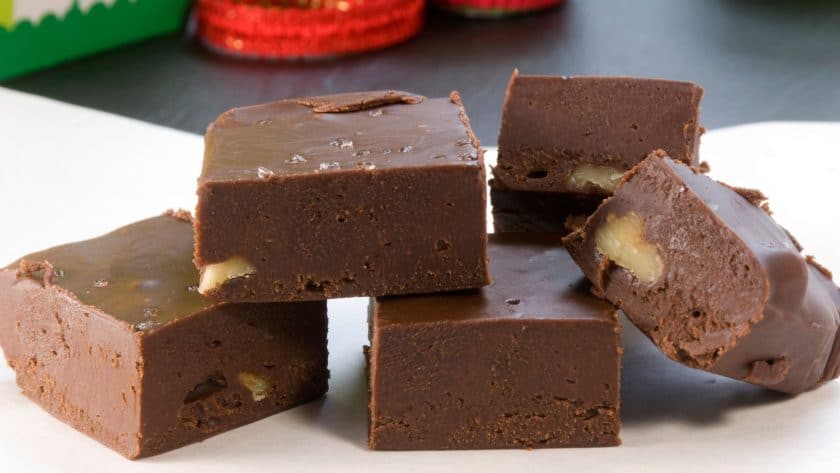
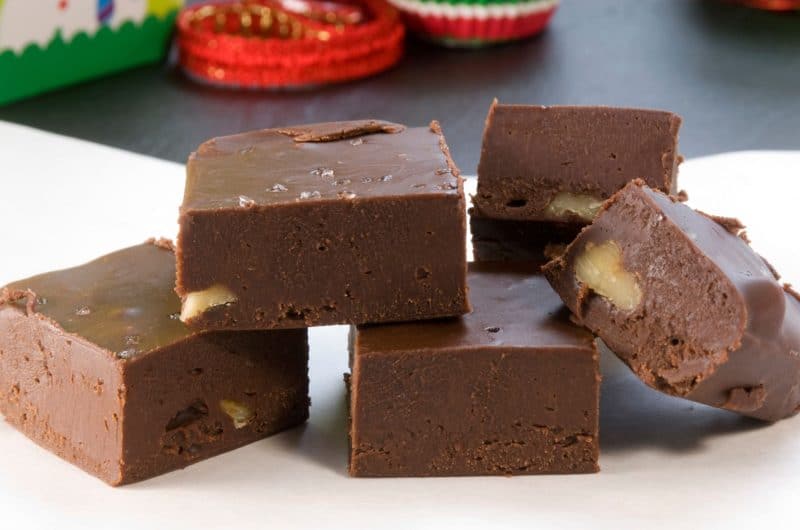
- Chocolate Chips – The base flavour of the fudge. I’ve made it with semi-sweet and milk chocolate. Semi-sweet creates a deeper, less sugary result.
- Sweetened Condensed Milk – This is the structure of the fudge. It creates the creamy texture without needing sugar syrup.
- Vanilla Extract – Adds warmth and depth. I once skipped it thinking the chocolate would carry the flavour—but the fudge tasted noticeably flatter.
Make It Your Own Version
I’ve experimented with a few additions that work beautifully.
Nutty Version
- Stir in ½ cup chopped walnuts or pecans just before pouring into the pan.
Mint Chocolate Fudge
- Add ¼ teaspoon peppermint extract with the vanilla.
Peanut Butter Swirl
- Warm ¼ cup peanut butter and swirl it gently through the mixture before it sets.
Vegan Version
- Use vegan chocolate chips and sweetened condensed coconut milk.
Avoid The Common Mistakes
| What Went Wrong | Why It Happens | How to Fix It |
|---|---|---|
| Grainy fudge | Chocolate overheated | Melt slowly over low heat |
| Fudge wouldn’t set | Used evaporated milk by mistake | Use sweetened condensed milk |
| Sticky cutting | Tried slicing before fully set | Let it rest at least 4 hours |
I also discovered that cheap chocolate chips sometimes refuse to melt smoothly, so using a better brand really helps.
Make This Recipe
1. Prepare the pan
Line an 8×8 inch baking tin with parchment or foil, leaving some overhang so you can lift the fudge out later.
2. Melt the chocolate
Place chocolate chips and sweetened condensed milk in a saucepan.
Set over low heat and stir continuously.

3. Add vanilla
Once the chocolate begins melting, stir in the vanilla extract.
Keep stirring until the mixture becomes smooth, glossy, and quite thick.
4. Transfer to the pan
Pour the mixture into the prepared pan.
It will be thick—use a spatula to gently spread it into the corners.
5. Let it set
Allow the fudge to set at room temperature for about 4 hours.
Resist the urge to rush this stage.
6. Slice neatly
Lift the fudge from the pan and place on a cutting board.
Cut into 36 small squares.
My Tips For You
- I use a silicone spatula to scrape every bit of chocolate from the saucepan.
- A warm knife cuts the fudge much more cleanly.
- If your kitchen runs warm, place the pan in the fridge for 30 minutes at the end of setting.
- I like sprinkling a tiny pinch of sea salt on top before it sets.
Storing Your Fudge
Room Temperature
Store in an airtight container for up to 2 weeks.
Freezer
Freeze pieces in a sealed bag for up to 3 months.
Serving Ideas
- Holiday dessert trays
- Homemade gift boxes
- After-dinner coffee treat
FAQs
Does fudge need to be refrigerated?
No. It stores beautifully at room temperature in an airtight container.
Can you freeze chocolate fudge?
Yes. Freeze in a single layer and thaw at room temperature before serving.
Why didn’t my fudge set properly?
Most likely the chocolate didn’t melt evenly or the wrong milk was used.
Can I make fudge in the microwave?
Yes—heat the chocolate and condensed milk in 30-second bursts, stirring between each.
How long does homemade fudge last?
About two weeks at room temperature.
Similar Recipes
- Mary Berry Coffee Fudge Traybake
- Mary Berry Iced Chocolate Traybake With Fudge Icing
- Mary Berry Caramel Square Recipe