I’ve always been a traditionalist when it comes to ice cream—custard base, egg yolks, slow churning, the whole ritual. So when I first tried making a vegan ice cream version, I assumed it would be… fine. Pleasant, perhaps. But not something I’d go out of my way to make again.
My first attempt proved me right. It was icy, a bit flat, and melted far too quickly.
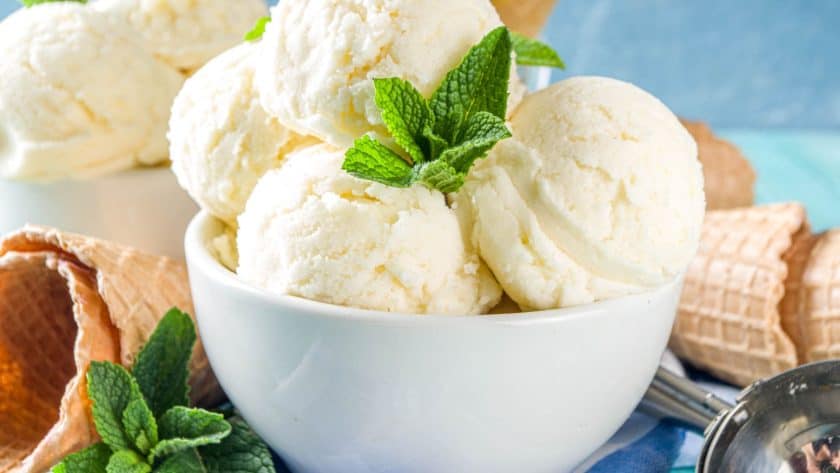
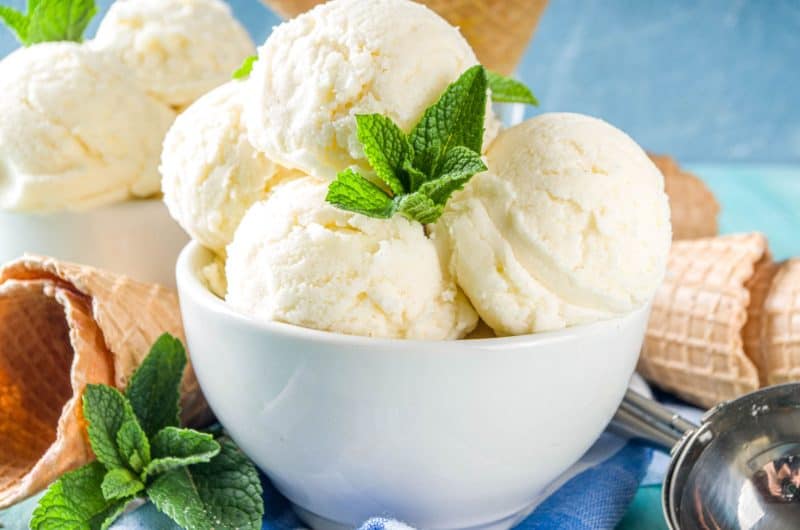
But then I tried again—with soaked cashews and proper full-fat coconut milk—and everything changed. The texture turned silky, almost like a soft gelato, and the flavour? Clean, creamy vanilla with those lovely little flecks running through it.
Now I keep a batch tucked in the freezer more often than I’d like to admit.
Let me show you what made the difference.
Mary Berry Vegan Ice Cream – Creamy, Scoopable, and Surprisingly Luxurious
Course: DessertCuisine: British16
servings30
minutes4
hours170
kcalIngredients
1 cup raw cashews (soaked overnight or boiled 5 minutes)
2 cans (13.4 oz each) full-fat coconut milk
1 tablespoon vanilla bean paste (or extract)
⅔ cup sugar
½ teaspoon sea salt
Directions
- Soak cashews overnight or boil for 5 minutes, then drain.
- Blend cashews, coconut milk, sugar, vanilla, and salt until smooth.
- Refrigerate mixture for at least 4 hours.
- Churn in ice cream maker for 20–25 minutes.
- Transfer to container and freeze for at least 4 hours.
- Let sit at room temperature for 5 minutes before scooping and serving.
What Makes This Vegan Ice Cream Recipe Special
The real magic lies in the combination of cashews and coconut milk.
Most vegan ice cream rely on just one base, which can leave them either too thin or too heavy. But blending soaked cashews creates a natural creaminess that mimics traditional ice cream surprisingly well.
What truly surprised me during testing was how important chilling the mixture is before churning.
I once skipped it (impatient, as usual), and the ice cream turned out noticeably less smooth. After letting it chill properly for a few hours, it churned faster and set with a much better texture.
It’s a small step—but it makes all the difference.
INGREDIENTS + WHY THEY MATTER
- Raw Cashews – The backbone of the creaminess. When soaked and blended, they create a smooth, rich base.
- Full-Fat Coconut Milk – Adds fat and body. I tried a “light” version once—it turned icy and disappointing.
- Vanilla Bean Paste (or Extract) – Gives that classic flavour. I love seeing the little specks from the bean.
- Sugar – Sweetens and also helps keep the ice cream soft enough to scoop.
- Sea Salt – Just a pinch enhances the vanilla and balances the sweetness.
Making It Yours (Without Ruining It)
I’ve tested a few variations that hold up beautifully.
Chocolate Version
- Add ¼ cup cocoa powder to the blender.
Berry Swirl
- Fold in raspberry or strawberry jam after churning.
Nut-Free Option
- Replace cashews with sunflower seeds (soaked)—slightly different flavour, but still creamy.
Less Sweet
- Reduce sugar to ½ cup—still scoopable, just less sweet.
Mistakes I’ve Made (And How to Avoid Them)
| What Went Wrong | Why It Happens | How to Fix It |
|---|---|---|
| Grainy texture | Cashews weren’t fully softened | Soak overnight or boil 5 minutes |
| Icy ice cream | Used light coconut milk | Always use full-fat |
| Hard to scoop | Didn’t chill base or froze too long uncovered | Chill mixture and cover tightly |
One particularly warm afternoon, I tried churning this with a barely frozen ice cream bowl—it never thickened properly. Since then, I always freeze the bowl overnight.
HOW TO MAKE MARY BERRY’S VEGAN VANILLA ICE CREAM
1. Soak the cashews
Soak cashews overnight in water.
If you’re short on time, boil them for 5 minutes, then cool and drain.
2. Blend the mixture
In a high-speed blender, combine:
- soaked cashews
- coconut milk
- sugar
- vanilla
- salt
Blend until completely smooth—this can take 2–4 minutes.
The mixture should feel silky, not gritty.
3. Chill thoroughly
Transfer the mixture to a container and refrigerate for at least 4 hours.
This step helps the ice cream churn properly.
4. Churn
Pour the chilled mixture into your ice cream maker.
Churn for 20–25 minutes, until thick and creamy.
It should resemble soft-serve at this stage.
5. Freeze to set
Transfer to a container or loaf tin.
Press parchment or wrap directly onto the surface to prevent ice crystals.
Freeze for at least 4 hours.
6. Serve
Let sit at room temperature for 5 minutes, then scoop and serve.
TIPS FROM MY KITCHEN
- I keep my ice cream maker bowl in the freezer all the time—one less thing to remember.
- If your blender struggles, add a splash more coconut milk to help it along.
- Taste the mixture before chilling—it should taste slightly sweeter than you want.
- I often churn this in the evening and let it set overnight—it scoops beautifully the next day.
STORAGE + SERVING
Freezer
Store tightly covered for up to 2 weeks.
To Prevent Ice Crystals
Press wrap directly onto the surface before sealing.
Serving Ideas
- With warm apple cake or pie
- Drizzled with caramel sauce
- In cones or sandwiched between cookies
FAQs
Do you need an ice cream maker?
It helps achieve the creamiest texture, but you can freeze and stir the mixture every 30 minutes as an alternative.
Why soak cashews?
Soaking softens them so they blend completely smooth.
Can I use light coconut milk?
I wouldn’t recommend it—it results in a much icier texture.
How long does vegan ice cream last?
About 2 weeks in the freezer when stored properly.
Why is my ice cream too hard?
It likely needs a few minutes at room temperature before scooping.
Other Recipes You May Like
- Mary Berry Vegan White Layer Cake Recipe
- Mary Berry Vegan Banana Bread Recipe
- Mary Berry Vegan Brownies Recipe