I’ll be honest—the first time I made these, I ended up with one enormous brandy puddle rather than individual snaps. I misjudged the spacing (more on that later), and all four spoonfuls on the tray baked into one thin, chewy sheet. Tasted divine, looked like an accident.
But once I got the hang of the rolling while hot trick (and didn’t wander off mid-bake), these became one of my go-to “impress without fuss” bakes. They’re the kind of thing that makes people say “you made these?!” with actual awe.
If you’ve ever been scared off by their delicate look or fiddly shaping, don’t be—I’ll show you exactly how I got past the burnt sugar stage and made them snap-perfect.
Why This One Works So Well
These snaps are all about the timing and the crackle-to-bite ratio. Mary’s version keeps it simple, but here’s what makes it work better than most:
- The mix is thick but pourable, which spreads just right—not too gloopy, not too thin.
- Lemon juice cuts the sweetness just enough. I tried leaving it out once (thinking it was optional)—the result was cloying and oddly flat.
- Most recipes don’t tell you to cool the mix before adding flour, but it matters. Skip that step, and you’ll get greasy blobs instead of delicate lacy rounds.
INGREDIENTS + WHY THEY MATTER
- Butter (½ cup / 114g) – Gives richness and that essential snap once cooled. I once used margarine—don’t. It melted too fast and never crisped properly.
- Demerara Sugar (½ cup / 100g) – Adds that subtle crunch and caramel depth. Brown sugar makes it too molasses-heavy.
- Golden Syrup (⅓ cup / 113g) – Key to the chewiness before the snap sets. I tested with honey and light corn syrup—both too runny and gave odd flavours.
- All-purpose Flour (1 cup / 100g) – Just enough to hold things together without turning cakey.
- Ground Ginger (1 tsp) – For warmth, not heat. It’s background flavour magic.
- Lemon Juice (1 tsp) – Brightens everything and keeps it from tasting one-note sweet.
Making It Yours (Without Ruining It)
- Gluten-Free? I tested with a 1:1 GF flour blend (Doves Farm). It worked, but the edges were a bit more fragile. Still snapped beautifully when cooled.
- Dairy-Free? I tried with vegan block butter (Flora). Texture was spot on, but the flavour was missing that buttery richness.
- Spice Swap: Ground cinnamon works in place of ginger for a warmer profile—especially good for autumn.
- Want curls instead of tubes? Use the handle of a whisk or roll over a wine bottle neck (cooled, not full—trust me).
MISTAKES I’VE MADE (AND HOW TO AVOID THEM)
| What Went Wrong | Why It Happens | How to Fix It |
|---|---|---|
| All merged into one blob | Too close together on the tray | Space each teaspoon 4 inches apart, minimum |
| Snaps too chewy | Didn’t bake long enough | Wait for golden brown, not just light brown |
| Too stiff to roll | Waited too long to shape them | Roll within 30 seconds—reheat if needed |
| Broke while rolling | Mixture cooled too much or was too thick | Warm it again or roll over smaller handle |
HOW TO MAKE MARY BERRY’S BRANDY SNAPS
- Preheat the oven to 180°C / 350°F (160°C fan) and line two large baking sheets with baking paper. Lightly oil the handles of 3–4 wooden spoons or dowels.
- Melt butter, sugar & syrup in a heavy pan on low heat—don’t rush this. Stir until smooth and bubbling gently (about 10–15 mins). Let cool for 2–3 minutes.
- Add flour, ginger, lemon juice. Sift in the dry stuff, stir until smooth. Let the mix cool fully to room temp—it thickens slightly, making it easier to portion.
- Drop by teaspoons, well spaced (they really spread). Only bake 4 per tray.
- Bake for 10–15 mins, until deep golden and bubbly across the surface. Watch closely after 10 minutes—they go from golden to burnt in 60 seconds.
- Shape fast: Let sit 30–60 seconds out of the oven. They should still be pliable, like warm toffee. Use a metal spatula to lift and roll around oiled spoon handles.
- Cool on a rack. Once crisp, slide off gently and store airtight.

TIPS FROM MY KITCHEN
- I rest the tray on the open oven door while shaping—keeps the rest warm and pliable.
- If you’re making lots, bake one tray at a time so you can focus on rolling.
- A silicone baking mat helps more than parchment—no tearing or sticking.
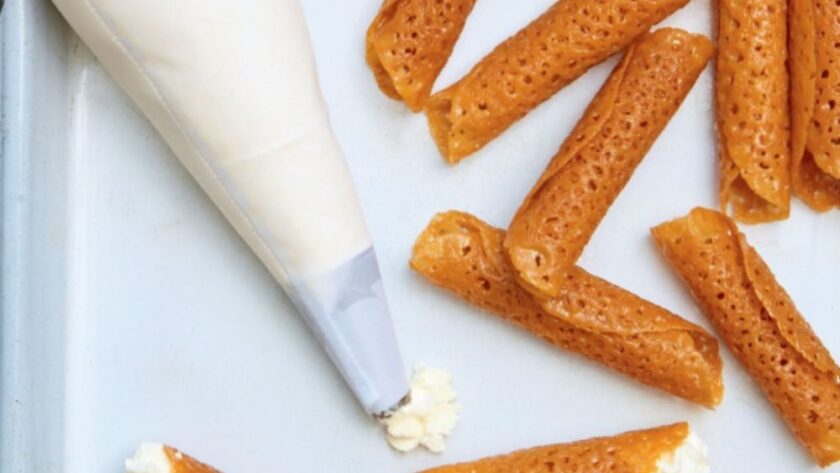
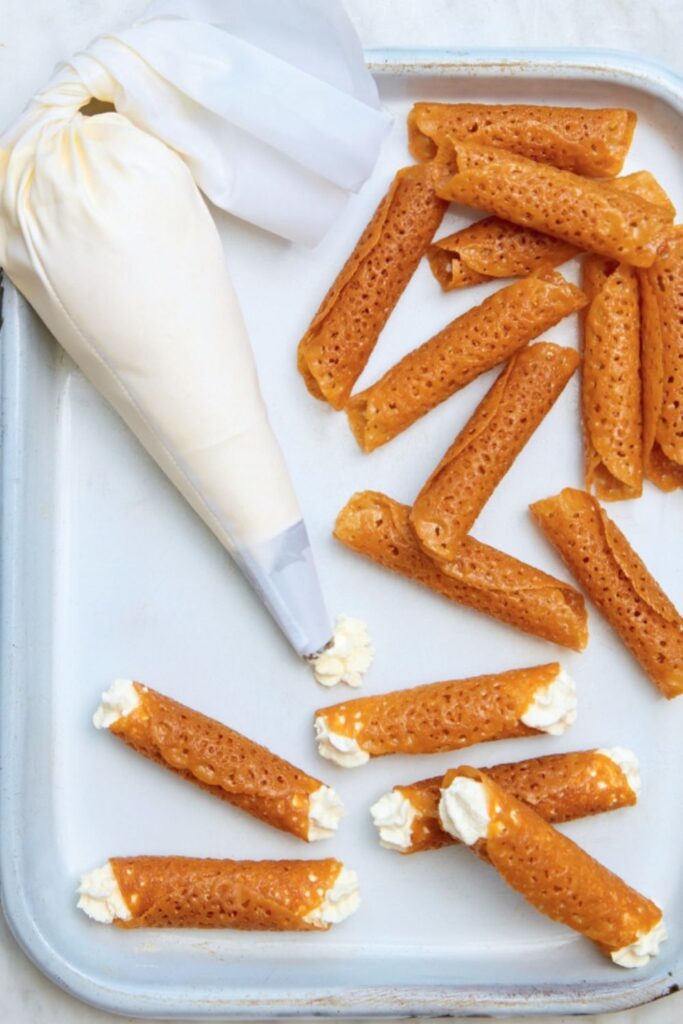
- If you want to pipe cream inside, do it right before serving—they soften quickly.
STORAGE + SERVING
- Keeps 5–7 days in a very airtight tin.
- Don’t refrigerate—the moisture ruins the snap.
- Serve filled with whipped cream, mascarpone + berries, or even lemon curd.
- Not freezer-friendly. They lose their texture completely.
FAQs – Real Answers from My Oven
Q: Why are my brandy snaps chewy, not crispy?
A: Most likely underbaked. They need to go golden and lacy all over. Also, make sure they’re fully cooled before storing.
Q: Can I shape them into baskets instead of rolls?
A: Yes! Drape them over an upturned muffin tin or ramekin while hot. They firm up in minutes.
Q: What’s the best way to fill them?
A: Whip double cream with a touch of vanilla or orange zest. Use a piping bag just before serving—they go soft fast.
Q: Can I use brown sugar instead of demerara?
A: You can, but the texture changes slightly—it’s less crisp and more chewy. I prefer the crunch of demerara.
Q: Are these actually made with brandy?
A: Nope! The name’s historical. No booze involved—though no one’s stopping you from adding a splash to the cream.
Try More Recipes:
- Mary Berry Chocolate Steamed Pudding
- Mary Berry Gooseberry And Elderflower Fool
- Mary Berry Fresh Cream Sponge Cake
- Mary Berry Pavlova With Rosy Red Fruits and Cassis
Mary Berry Brandy Snaps
Course: DessertsCuisine: BritishDifficulty: Easy12
servings15
minutes15
minutes160
kcalCrispy, golden curls with a hint of ginger—these classic brandy snaps are easier than they look and irresistibly moreish.
Ingredients
114g (½ cup) unsalted butter
100g (½ cup) demerara sugar
113g (⅓ cup) golden syrup
100g (1 cup) all-purpose flour
1 tsp ground ginger
1 tsp lemon juice
Directions
- Preheat oven to 180°C/350°F (160°C fan). Line 2 trays with baking paper. Oil 4 wooden spoon handles.
- Melt butter, sugar, syrup in a heavy saucepan. Let cool 2–3 minutes.
- Sift in flour and ginger. Stir in lemon juice. Cool mixture to room temp.
- Drop teaspoons onto tray, 4 per tray, 4 inches apart.
- Bake 10–15 mins until golden and lacy.
- Let sit 30 secs, then roll each around spoon handle. Cool on rack.
- Store airtight. Fill just before serving.
Notes
- I rest the tray on the open oven door while shaping—keeps the rest warm and pliable.
- If you’re making lots, bake one tray at a time so you can focus on rolling.
- A silicone baking mat helps more than parchment—no tearing or sticking.
- If you want to pipe cream inside, do it right before serving—they soften quickly.