The first time I made these, I was babysitting my niece during half-term. I needed something quick, mess-friendly, and forgiving—ideally without a sugar meltdown halfway through. Enter fairy cakes. We decorated them with everything from jelly beans to unicorn sprinkles. They weren’t neat, but they were pure joy. That’s the beauty of these little bakes: they’re as fun to make as they are to eat.
One small hiccup? I made the icing too runny, and it dribbled straight off the cakes like a scene from a baking horror film. But once I adjusted the texture (and let the cakes cool properly—don’t skip that), we had a tray of glossy-topped, fluffy fairy cakes ready for a tea party on the kitchen floor.
WHAT MAKES THIS RECIPE SPECIAL
These aren’t cupcakes pretending to be posh. Fairy cakes are smaller, lighter, and unapologetically simple. What I love about Mary’s version:
- All-in-one batter – No creaming, no fuss. Just chuck it in and mix.
- Soft, airy crumb – Thanks to a generous hit of baking powder.
- The icing sets to a delicate crust – Not too sweet, but perfect for decorating.
They’re the kind of bake that makes you feel like a kid again—even if you’re the one doing the washing up.
INGREDIENTS + WHY THEY MATTER
FOR THE CAKES
- Salted Butter (115g) – Adds flavour and richness. Don’t skip softening—it whips up smoother.
- Granulated Sugar (115g) – Simple and sweet. Caster sugar works too.
- Extra-Large Eggs (2) – Room temp helps them blend better.
- All-Purpose Flour (115g) – Just enough to keep them light and soft.
- Baking Powder (2 tsp) – Gives lift and that classic sponge texture.
- Salt (¼ tsp) – Just a pinch to balance everything.
FOR THE ICING
- Confectioners’ Sugar (225g) – Sift it or you’ll get lumps (ask me how I know).
- Warm Water (2–3 tbsp) – Start small. Too much and you’ll be chasing puddles.
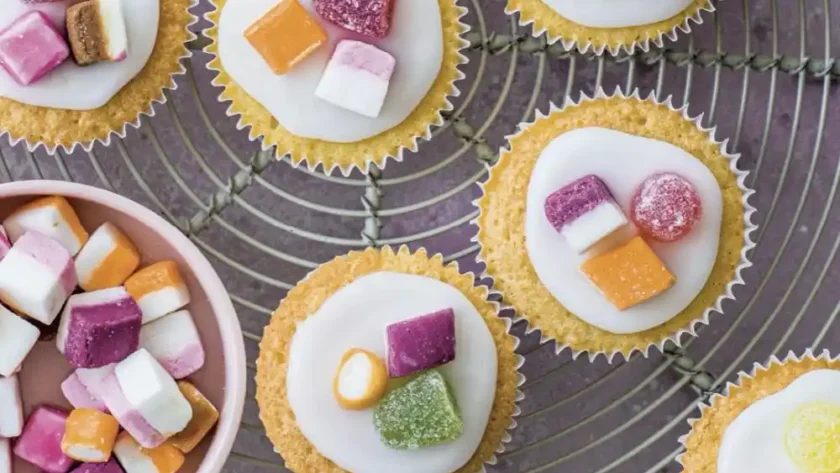
- Sweets – Jelly tots, chocolate buttons, smarties—anything fun goes.
MAKING IT YOURS (WITHOUT RUINING IT)
- Citrus Twist? Add zest of 1 orange or lemon to the batter. For the icing, use juice instead of water.
- Chocolate Version? Replace 2 tbsp flour with cocoa powder and add a few choc chips.
- Vegan Option? I tested with dairy-free spread and flax eggs—it works, but texture is slightly denser.
- Naturally Coloured Icing? Beet juice, matcha, or blueberry puree—just add a few drops for pastel hues.
MISTAKES I’VE MADE (AND HOW TO AVOID THEM)
| What Went Wrong | Why It Happens | How to Fix It |
|---|---|---|
| Icing slid off cakes | Cakes were still warm | Always cool completely before icing |
| Flat cakes | Old baking powder or overmixed batter | Use fresh powder and mix just until smooth |
| Icing too runny | Added too much water | Add liquid a spoon at a time—go slow |
HOW TO MAKE MARY BERRY’S ICED FAIRY CAKES
1. Preheat the Oven
Heat to 200°C (400°F). Line two 12-hole fairy cake tins with paper cases.
2. Mix the Batter
Add all cake ingredients to a mixing bowl: softened butter, sugar, eggs, flour, baking powder, salt. Beat for 2–3 minutes until smooth and fluffy.
3. Bake
Spoon evenly into cases (about two-thirds full). Bake for 15–20 minutes until golden and springy to touch.
4. Cool
Transfer to a wire rack and let cool completely. If they’re even slightly warm, the icing will melt.
5. Make the Icing
Sift confectioners’ sugar into a bowl. Add warm water slowly until thick but pourable—like glossy glue.
6. Decorate
Spoon icing over each cake and decorate while still wet. Let set for 10–15 minutes until slightly firm.
TIPS FROM MY KITCHEN
- I use a cookie scoop to portion the batter—makes every cake uniform.
- If I want pastel colours, I mix a dot of gel food colouring into the icing—less runny than liquid dye.
- I chill the icing bowl briefly before spooning—helps it set faster.
STORAGE + SERVING
- Room Temp: Airtight tin, up to 3 days. Icing may lose a bit of gloss, but flavour holds.
- Freezer: Freeze un-iced cakes for up to 3 months. Defrost at room temp before decorating.
- Serve with: A mug of hot chocolate or pink lemonade, depending on the audience.
FREQUENTLY ASKED QUESTIONS
Q: Can I double the batch?
A: Easily. Just make sure you don’t overcrowd the oven or bake on multiple levels—heat distribution matters.
Q: Can I add food colouring to the batter?
A: Yep! Gel works best—won’t thin the mixture.
Q: Why are mine a bit dry?
A: Could be overbaking. Check them at 15 minutes—they’re small and can dry fast.
Q: Can I use margarine instead of butter?
A: You can, but the flavour isn’t quite the same. Go for butter if you can.
Try More Recipes:
- Mary Berry Celebration Chocolate Mousse Cake
- Mary Berry Malted Chocolate Cake
- Mary Berry Chocolate Cupcakes
- Matcha Tea – Tradition Meets Modern Wellness

Mary Berry Iced Fairy Cakes
Course: CakesCuisine: BritishDifficulty: Easy24
servings10
minutes20
minutes140
kcalLight, fluffy, and topped with glossy icing, these fairy cakes are a British classic—perfect for parties, bake sales, or a rainy afternoon indoors. No fuss, no drama, just sweet little cakes ready for sprinkles and smiles.
Ingredients
- For the Cakes:
115g salted butter, softened
115g granulated sugar
2 extra-large eggs
115g all-purpose flour
2 tsp baking powder
¼ tsp salt
- For the Icing:
225g confectioners’ sugar, sifted
2–3 tbsp warm water
Sweets, to decorate
Directions
- Preheat oven to 200°C (400°F). Line two 12-cup fairy cake tins with paper liners.
- Add all cake ingredients to a bowl. Beat 2–3 minutes until smooth.
- Divide into cases. Bake 15–20 minutes until golden. Cool on a wire rack.
- Mix icing sugar with warm water until thick and smooth.
- Spoon icing over cooled cakes. Decorate with sweets. Let set.
Notes
- Make sure cakes are fully cool before icing—or it’ll melt off.
- Gel food colouring gives you fun pastel icing without thinning it.
- Use a cookie scoop for even-sized fairy cakes every time.