I used to think roast gammon was one of those intimidating centrepieces that only confident Christmas cooks could pull off. My first attempt looked promising until I sliced into it and discovered two problems: the crackling was rubbery, and the meat was salty enough to make everyone reach for an extra glass of water.
The next year, I kept things simple. I soaked the joint overnight, dried the skin like my life depended on it, and used a very basic honey and mustard glaze. The crackling crackled, the glaze turned gloriously sticky, and my brother quietly wrapped three slices in foil to take home.
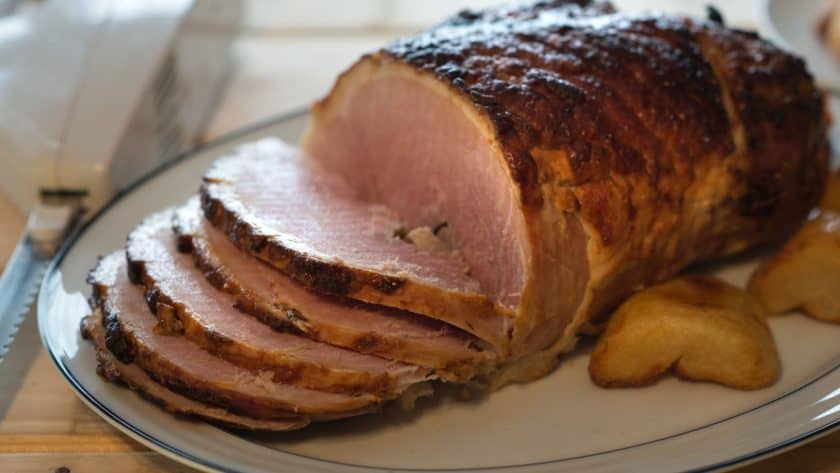
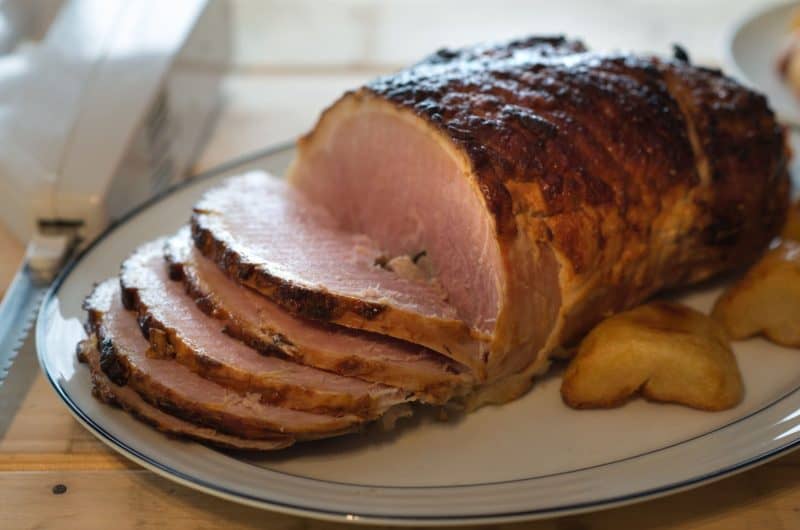
This is the roast gammon I now make every Christmas and Easter in my battered old roasting tin with the slightly warped corner. It’s wonderfully juicy, easy to prepare, and just as good cold in sandwiches as it is hot with roast potatoes.
If you’ve ever worried about overcooking gammon or ending up with chewy crackling, let me show you exactly what worked for me.
Mary Berry Roast Gammon – Crispy Crackling and a Sticky Honey Mustard Glaze
Course: DinnerCuisine: British10
servings15
minutes2
hours30
minutes300
kcalIngredients
2 kg gammon joint, skin on
2 tablespoons table salt
1 tablespoon vegetable oil
2 tablespoons clear honey
2 tablespoons wholegrain mustard
Directions
- Remove the gammon from the fridge 30 minutes before cooking.
- Score the skin in lines or diamonds.
- Rub with 1 tablespoon of salt and leave for 30 minutes.
- Rinse and pat the skin completely dry.
- Rub with oil and sprinkle over the remaining salt.
- Place in a foil-lined roasting tin.
- Roast at 200°C (180°C fan) for 20 minutes.
- Reduce the oven to 180°C (160°C fan) and continue cooking.
- Roast for a total of 30 minutes per 500 g plus 30 minutes.
- Thirty minutes before the end, remove the crackling.
- Mix honey and mustard and brush over the gammon.
- Return to the oven for the final 30 minutes.
- Rest for 30 minutes before carving.
Why This One Works So Well
Most gammon recipes overcomplicate things with long poaching times, elaborate glazes, and a lot of washing up.
This version works because:
- The skin is salted twice, which helps draw out moisture for crisp crackling.
- The gammon starts in a hot oven, then finishes more gently so the meat stays juicy.
- The glaze is added at the end, so it caramelises instead of burning.
- You can soak the joint first if you’re sensitive to salt.
I didn’t think rinsing off the first layer of salt would make much difference, but it really did. The skin dried beautifully and puffed into proper crackling rather than staying leathery.
INGREDIENTS + WHY THEY MATTER
- 2 kg Gammon Joint (smoked or unsmoked) – The star of the show. I usually buy smoked because I love the deeper flavour, but unsmoked is milder and more traditional.
- 2 Tablespoons Table Salt – Essential for drying the skin and encouraging crisp crackling.
- 1 Tablespoon Vegetable Oil – Helps the skin blister and turn golden.
- 2 Tablespoons Clear Honey – Creates a glossy, sticky finish.
- 2 Tablespoons Wholegrain Mustard – Adds gentle heat and a lovely textured coating.
Optional Extras
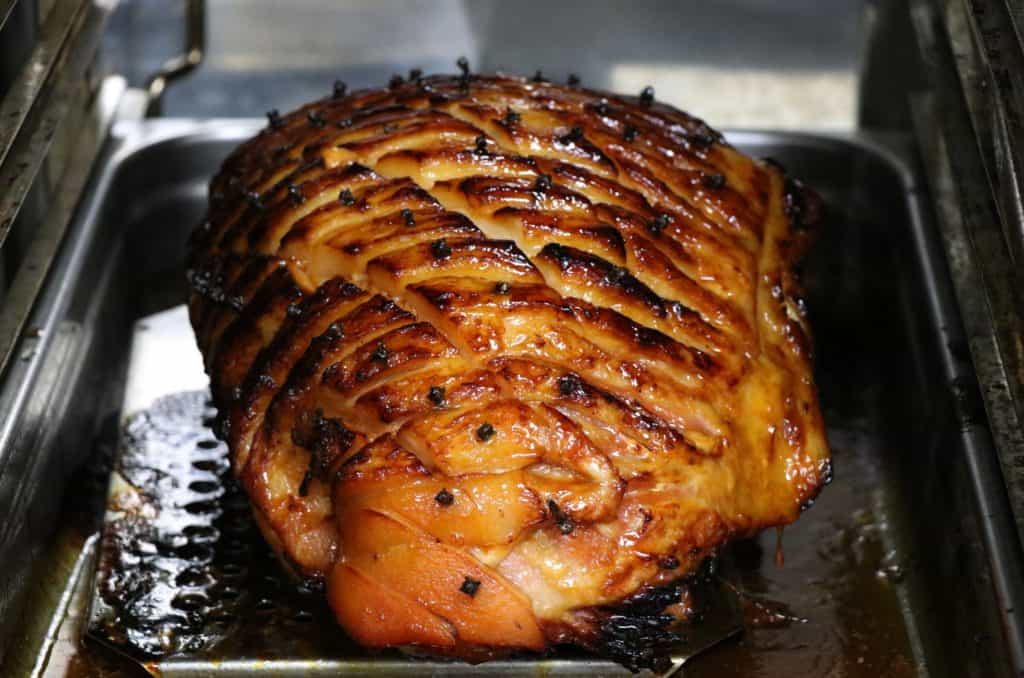
- A few whole cloves for a traditional finish.
- Orange marmalade instead of honey for a citrusy glaze.
Making It Yours (Without Ruining It)
Smoked vs Unsmoked
- Smoked gives a richer, more savoury flavour.
- Unsmoked is milder and often better if you’re serving children.
Mustard Options
- Wholegrain mustard is my favourite.
- Dijon gives a smoother glaze.
- English mustard is stronger, so use half as much.
Alternative Glazes
- Chunky marmalade
- Brown sugar and mustard
- Maple syrup and Dijon
Lower Salt Version
Soak the gammon overnight in cold water, then rinse well before roasting.
MISTAKES I’VE MADE (AND HOW TO AVOID THEM)
| What Went Wrong | Why It Happens | How to Fix It |
|---|---|---|
| Crackling stayed chewy | Skin wasn’t dry enough | Pat the skin thoroughly dry before oiling |
| Gammon was too salty | Didn’t soak a particularly salty joint | Soak overnight and rinse well |
| Glaze burned | Added too early | Brush on during the final 30 minutes only |
| Meat seemed dry | Cut straight away | Rest for at least 30 minutes |
HOW TO MAKE MARY BERRY’S ROAST GAMMON
Step 1: Bring the Gammon to Room Temperature
Take the gammon out of the fridge 30 minutes before cooking.
Cold meat tends to cook unevenly, especially in the centre.
Step 2: Score the Skin
Using a very sharp knife, score the skin in parallel lines or diamonds.
Try to cut through the skin and fat, but not deeply into the meat. If you go too far, the juices escape and the crackling can turn soggy.
Step 3: Salt the Skin
Rub half the salt over the skin, pushing it into the cuts.
Leave for 30 minutes.
This draws out moisture. The first time I skipped this step, the crackling never crisped.
Step 4: Rinse and Dry
Rinse off the salt and pat the skin very dry with kitchen paper.
Don’t rush this bit. Dry skin equals crisp crackling.
Step 5: Oil and Season
Rub the skin with oil and sprinkle over the remaining salt.
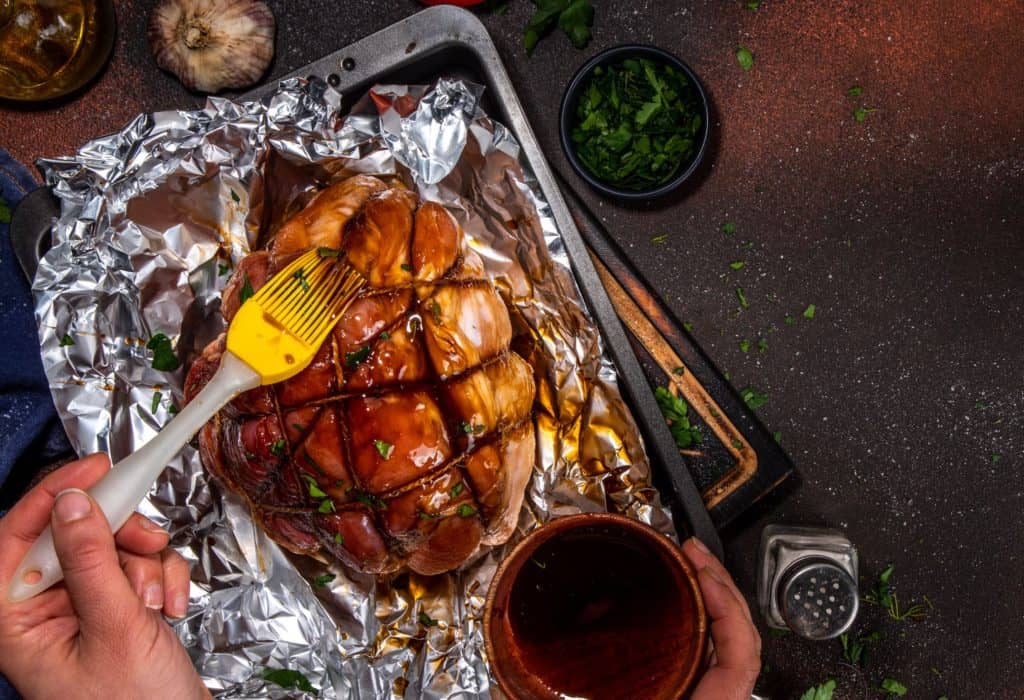
Step 6: Prepare the Roasting Tin
Line a large roasting dish with foil and place the gammon inside.
Scrunch the foil around the exposed meat to protect it while leaving the skin uncovered.
Step 7: Calculate Cooking Time
Allow:
30 minutes per 500 g, plus an extra 30 minutes.
For a 2 kg joint, that’s 2 hours 30 minutes total.
Step 8: Start Hot
Preheat the oven to:
- 200°C (400°F)
- 180°C fan
- Gas 6
Roast for 20 minutes.
This blast of heat gets the crackling started.
Step 9: Lower the Temperature
Reduce the oven to:
- 180°C (350°F)
- 160°C fan
- Gas 4
Continue roasting.
Step 10: Remove the Crackling
Thirty minutes before the end of cooking, remove the gammon from the oven.
The crackling may still feel slightly soft but will harden as it cools.
Lift off the crackling and set it aside.
Step 11: Glaze the Gammon
Mix the honey and mustard.
Brush generously over the exposed fat.
Step 12: Final Roast
Return the gammon to the oven for the last 30 minutes.
The glaze will darken, bubble, and become beautifully sticky.
Step 13: Rest
Rest in a warm place for 30 minutes before carving.
This keeps the meat juicy and much easier to slice.
TIPS FROM MY KITCHEN
- My fan oven runs hot, so I often check the glaze 10 minutes early.
- If some crackling stays soft, I pop it under the grill for 2–3 minutes.
- I use my oldest metal roasting tin because it holds heat better than ceramic.
- Cold slices are wonderful tucked into soft white bread with a bit of English mustard.
STORAGE + SERVING
Fridge
Store covered in the refrigerator for up to 5 days.
Freezer
Wrap tightly and freeze for up to 6 months.
Reheating
Wrap slices in foil with a splash of water and warm gently in the oven.
Serve Hot With
- Roast potatoes
- Honey roasted carrots and parsnips
- Cauliflower cheese
- Leeks in white sauce
Serve Cold With
- Chutney
- Potato salad
- Crusty bread
- Pickles
FAQ’s
Do I need to soak gammon before roasting?
Not always. If you’re worried about excess salt, soak it overnight in cold water and rinse well.
How long do I cook a 2 kg gammon joint?
About 2 hours and 30 minutes total.
Why is my crackling not crispy?
Usually the skin wasn’t dry enough, or the oven didn’t start hot enough.
Can I make roast gammon ahead of time?
Absolutely. I often cook it the day before and serve it cold.
What’s the difference between gammon and ham?
Gammon is cured pork sold raw and needs cooking. Ham is gammon that has already been cooked.